|
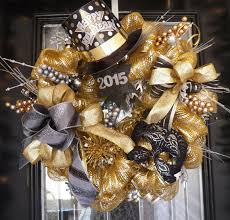
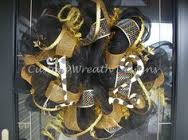
Happy Early New Years! 2017 is bound to bring us the best we have seen yet. I wanted to make New Years wreath for my front door. I scoured pinterest to see what I could find for inspiration. After getting a general idea I headed to the store! At Micheal's they had their gold wreaths on sale (Aren't after Christmas sales the best!). I bought gold garland the wrap part of the wreath in. I also picked up gold and black New Years's celebration decorations that I liked. Once home, armed with my glue gun, I began placing decorations where I liked them. Hope you and yours have a very Happy New Year's! 
0 Comments
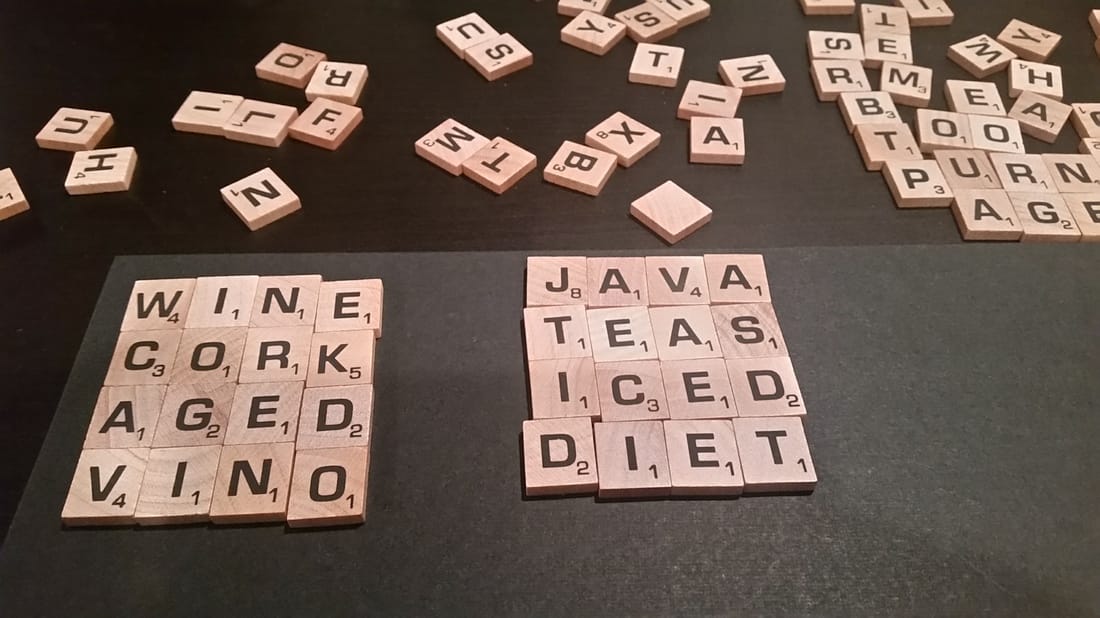
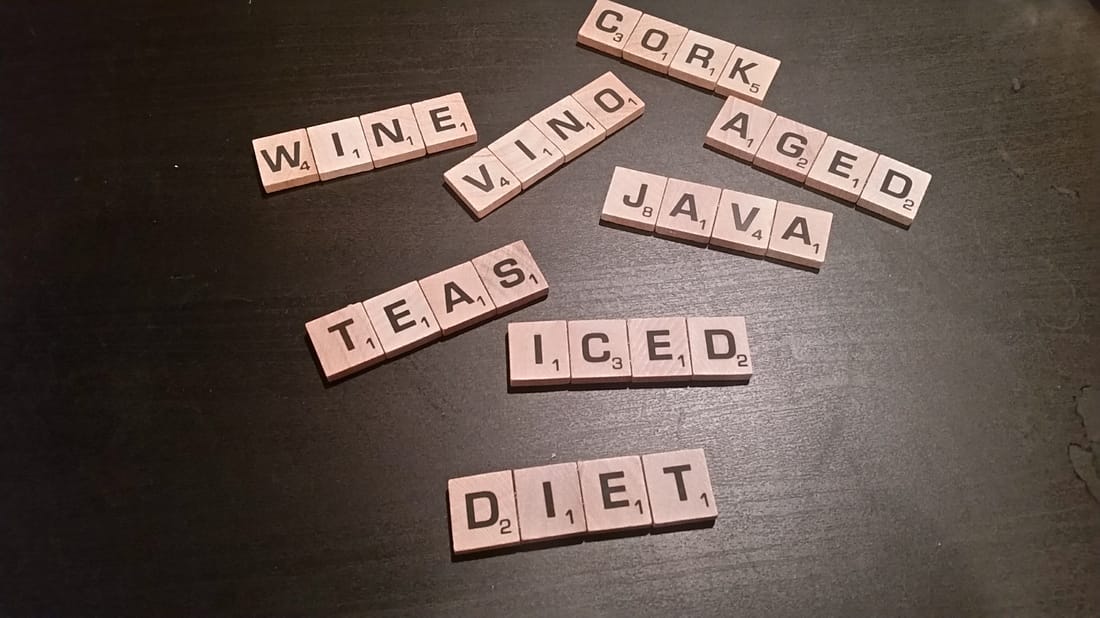
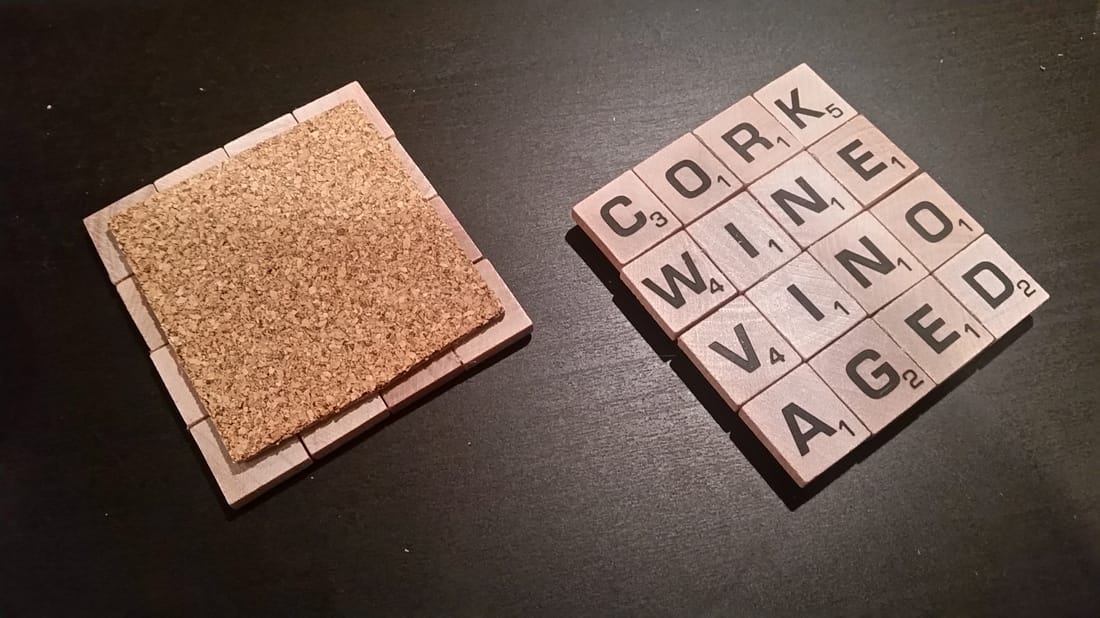
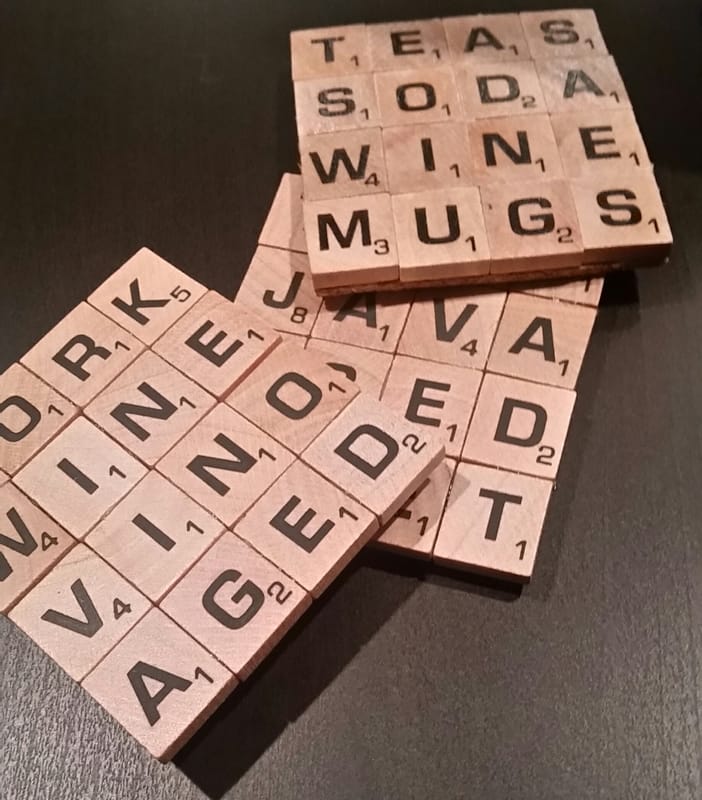
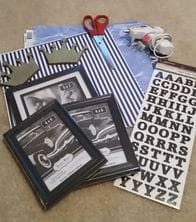 In the same converstion with my sister as the "donut snowmen" (see the Food and Drink section) she mentioned wanting to get her colleagues gifts for New Years. She teaches middle school and amongst other things she is the team lead. I thought of an easy DIY dry erase board pin I had seen on pinterest. I thought that with just the right size this picture frame dry ease board could sit on their desk and used instead of the mounds of sticky notes we teachers use. Materials 4 x 6 or 5 x 7 picture frame scrapbooking paper of your choice ABC stickers dry erase marker/eraser Scissors glue gun/glue Spray paint/paint Frame accessory of your choice  Step 1: Spray paint accessory-I used crowns and gold spray paint. 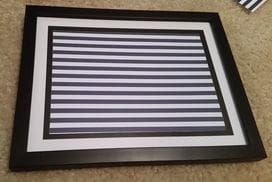 Step 2: Cut scrapbook paper to size to fit the frame. Insert scrapbook paper into frame then put the frame back together. 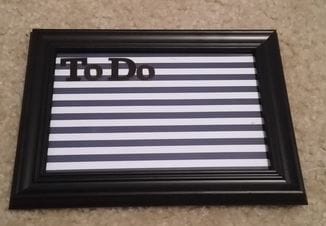 Step 3: Use the alphabet stickers to spell "To Do". You can choose any font or color or style of letters. You can arrange them in any way as well (vertical or horizontal). 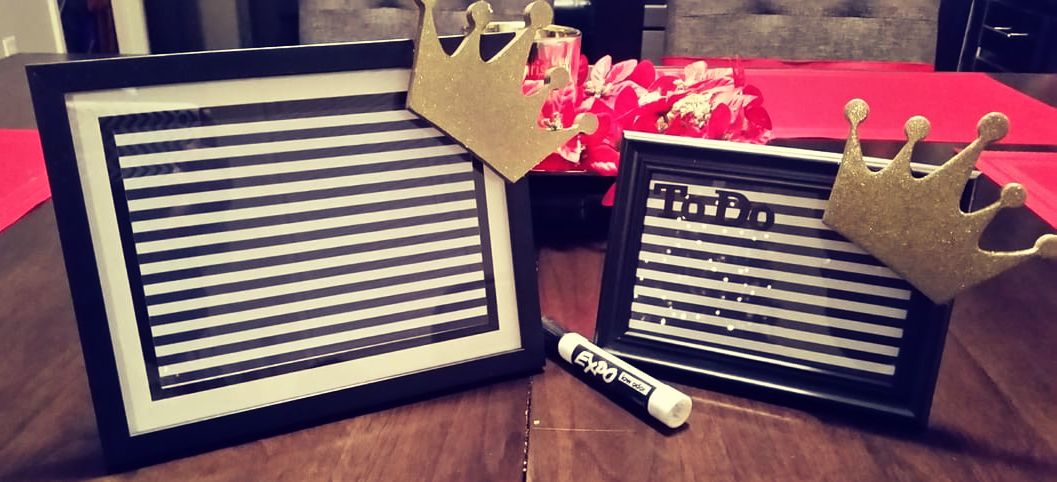 Step 4: Glue crown or accessory to the corner of the frame, grab a dry erase marker and enjoy your easy DIY dry erase board. Hope you enjoyed this easy project. Leave me a comment about a neat DIY gift you have made or would like to try! Looking for a new craft wasn't hard. There are so many great crafts out there. One I had become particularly interested in was the scrabble tile coasters. I found a ton of easy DIY tutorials to follow to make these creative coasters. I loved the idea of being able to personalize them and give them as gifts to my friends and family.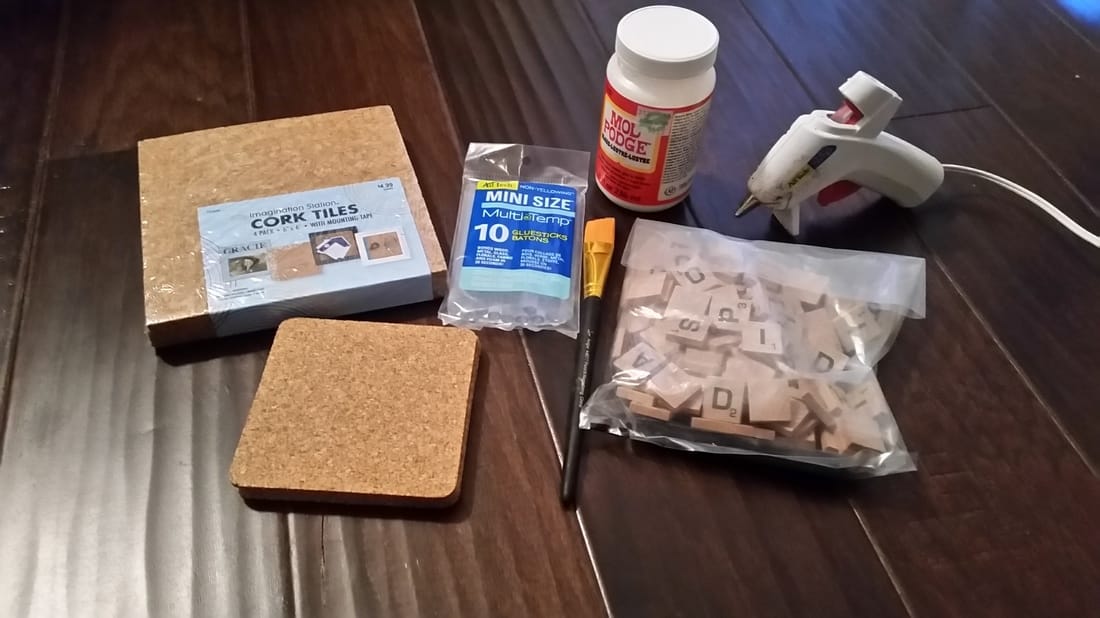 Materials needed: |
Archives
December 2019
|


 RSS Feed
