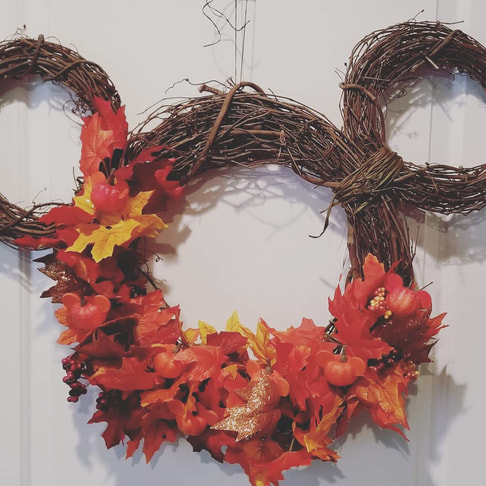
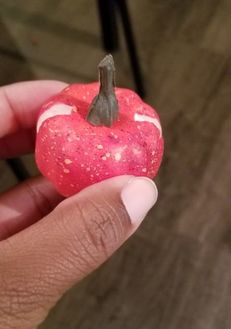
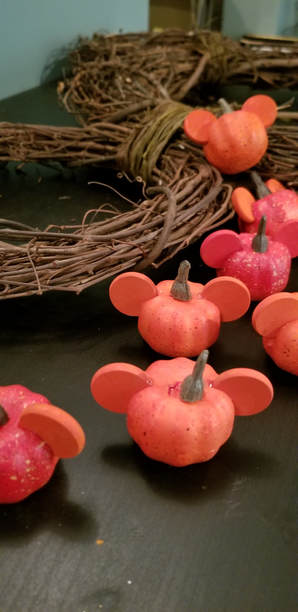
 It's almost Fall and you know what that means. It's time for Apple picking, pumpkin carving and time to decorate the house! Since I've been feeling a little Disney inspired lately I thought what's better than a Mickey Mouse Wreath for the front door?Absolutely nothing- so here it is! Here's how to make your very own Mickey Fall Wreath Materials Needed 3 wreaths-1 large and 2 small (Michaels) 2 Fall leaf garlands- I also bought a Fall leaf bouquet (Michaels) 1 pack of pumpkins (Hobby Lobby) 1 pack of small discs (Michaels) Orange paint (try to get as close to to the pumpkin color Raffia-to secure ears (Michaels) ***X-Acto knife, scissors, and hot glue gun *** 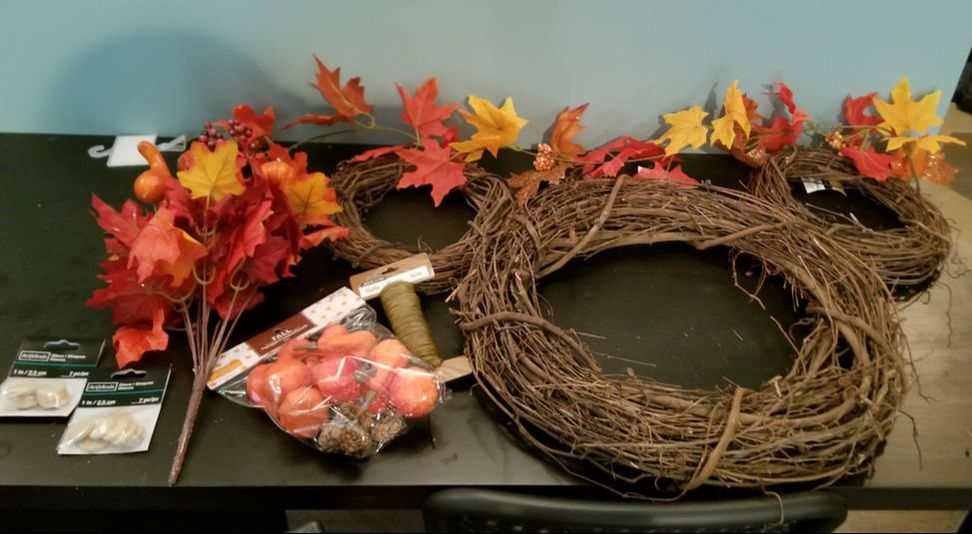 Directions: 1. Paint the discs orange on both sides (2 disc per pumpkin). I had to mix in a little red to match one of the pumpkins that were a little darker orange. 2. While the disc are drying is the perfect time to attach the ears to the head. I just eyeballed the spacing. Wrap the Raffia around the ear and head. The more wraps the better so the ear doesn't droop. I was able to get the Raffia about the same color as the wreath. 3. Once the discs are dry cut slits in the side of the pumpkins to insert the disc. I used a little hot glue in the slit to secure the disc.
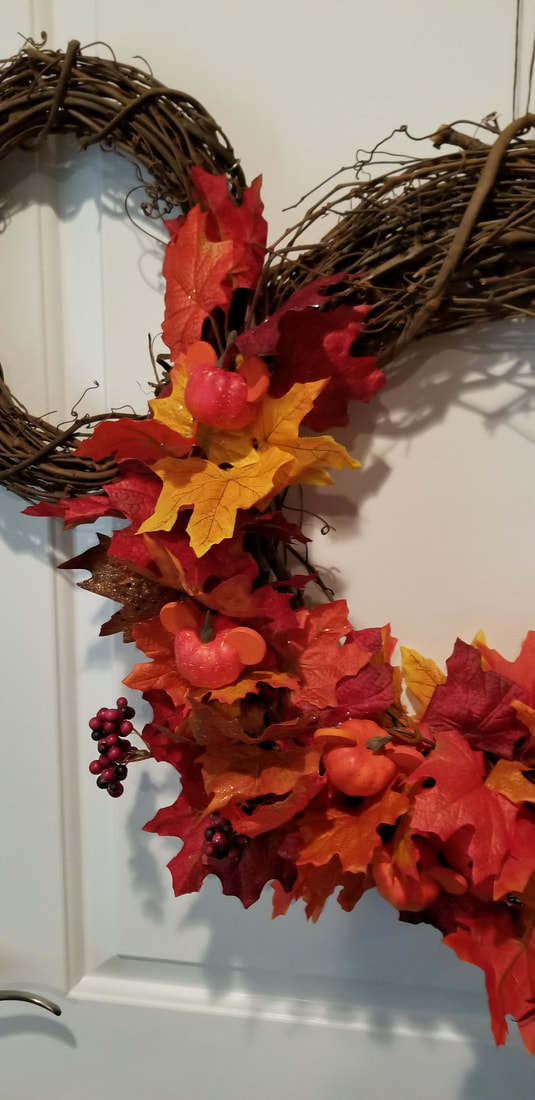
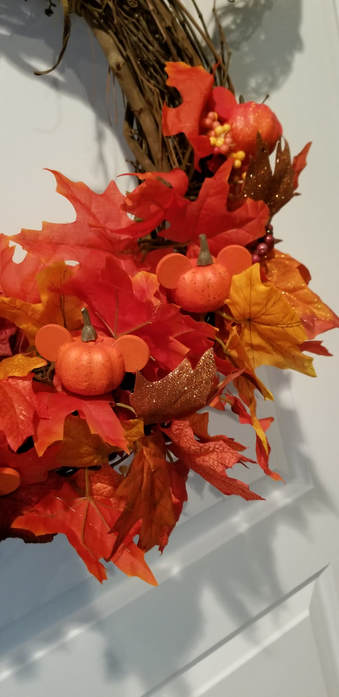
4. Now the fun part: START ASSEMBLING! Start wrapping garland, pulling leaves and berries off the garland or out of the bouquet and start shoving and poking them where you like them. It's all about you now and what you want so be creative!!!! Once the garland was secured I hot glued the Mickey pumpkins in various places. #hiddenmickeys
I love how this wreath turned out. Can you tell where we'd rather be??? 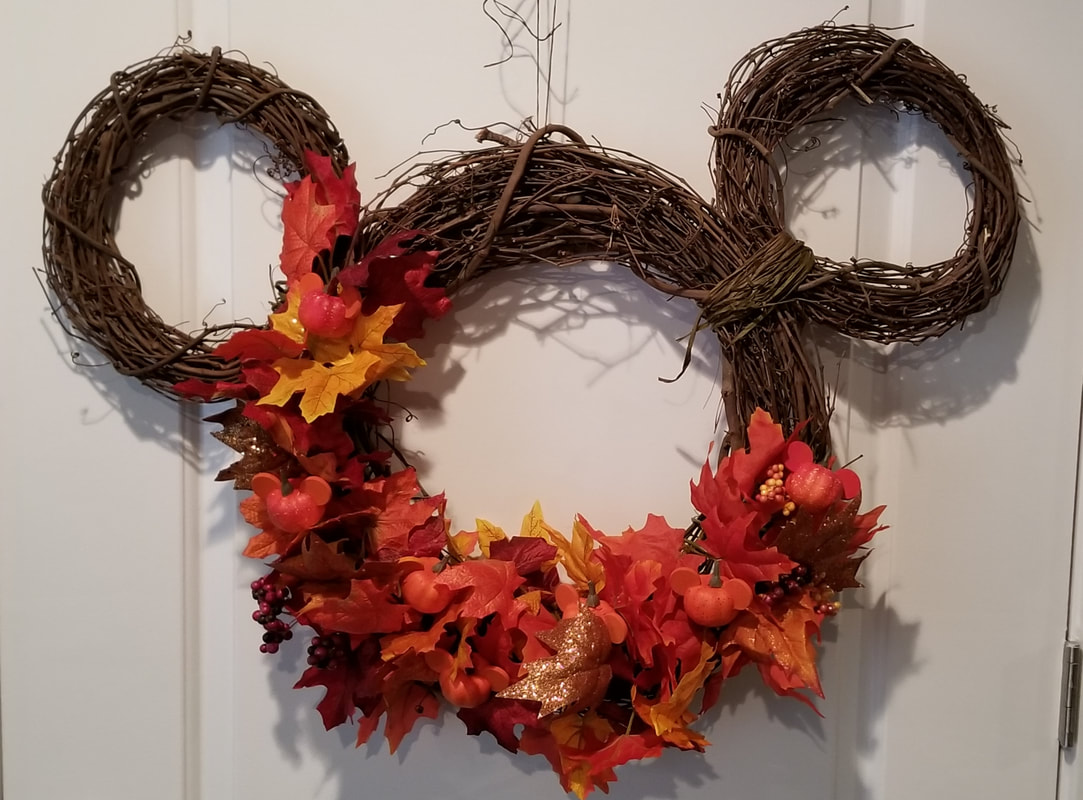
0 Comments
 For my daughter's 11th birthday we had a Red Carpet Movie Birthday. It was so much fun being able to DIY a lot of the decorations used for the party! 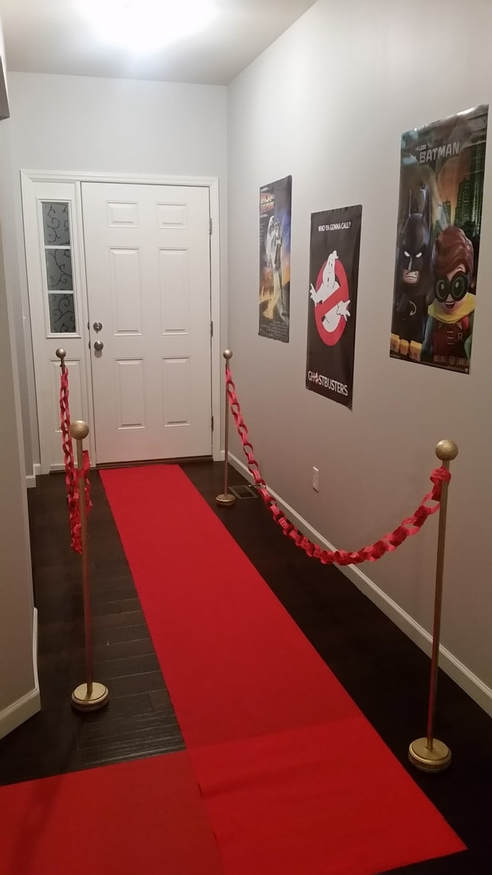 Red Carpet Ropes (Stanchions): These turned out great but were a little more complex to make. Find out how I did it at Lights...Camera...Action Movie Party DIY Part 2
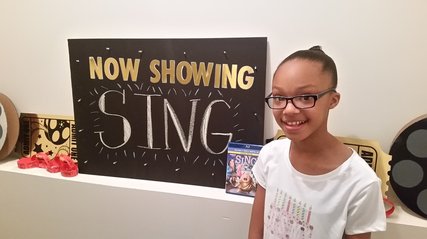
Photo Ticket Wall: Our photo was simple in nature but took awhile to complete. Tickets, painters tape and a lot of patience was needed! Find out how I did it at Lights...Camera...Action Movie Party DIY Part 2 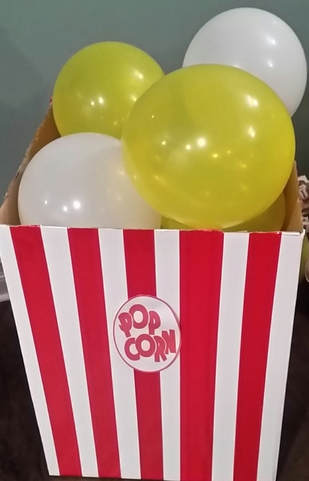 No movie party is complete without popcorn! How about a giant popcorn box!? Find out how I did it at Lights...Camera...Action Movie Party DIY Part 2 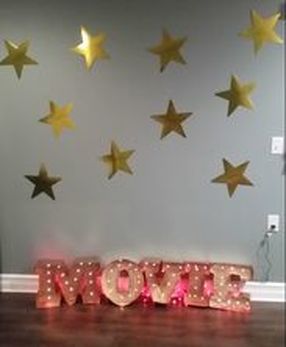 Movie Marquee Letters: Let everyone know what kind of party they are at with these fun letters. Find out how I made these letters at ohhappyday.com  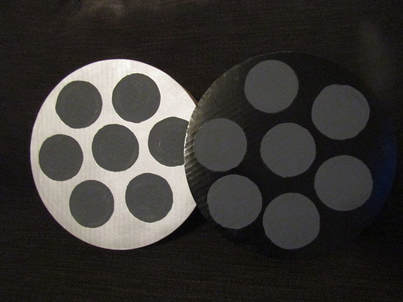 Now Showing Sign and Movie Reels: Find out how I made this at Movie Party DIY Scene 1 Check back soon for more DIY projects!
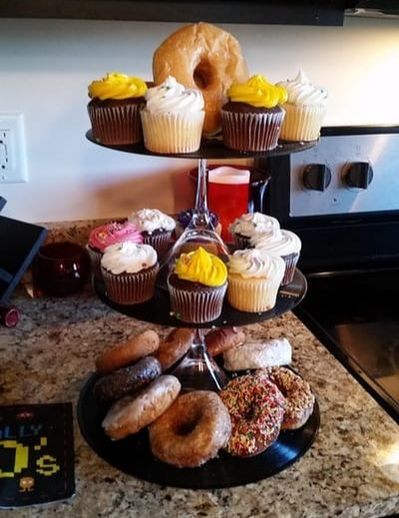
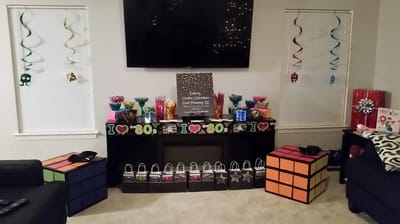
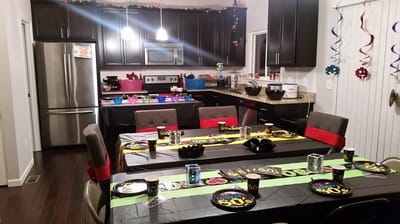
Happy Crafting!!! 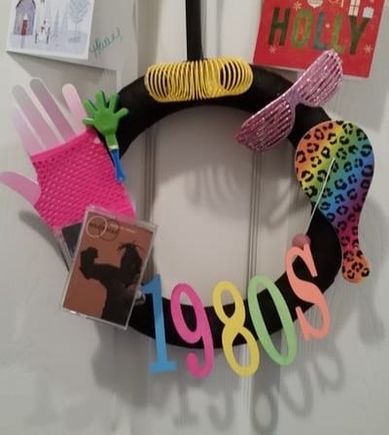 Who doesn't love a party full of 80's vibes! One of the best parties I created decorations for was the 80's theme Murder Mystery party I had for New Year's Eve a few years ago. It was so much fun. Here are some of the DIY projects that set the tone for the party. 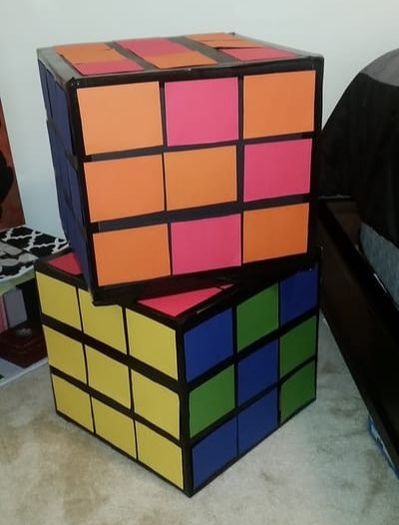 Rubix Cubes: Nothing says 80's more than a giant rubix cube. We used these rubix cubes as tables for snacks. 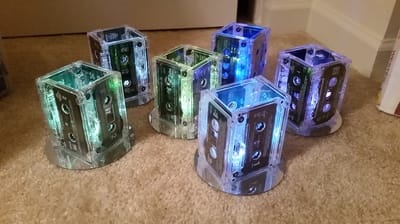 The centerpieces for the tables had to be my favorite. I found tapes and CD's at the local goodwill. With a little hot glue and a tea light you are done! 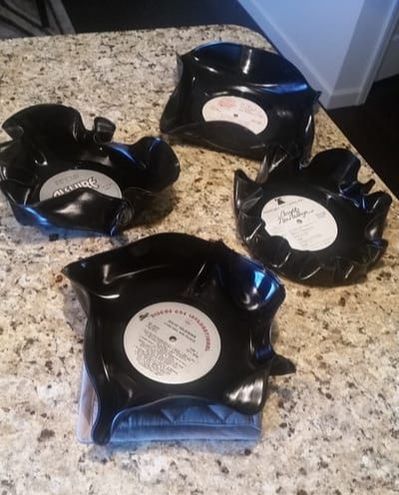 Record snack bowls: To hold snacks like chips, pretzels and cheese balls (NO 80's party is complete without cheese balls) the record bowls were perfect. HubPages How to Make a Vinyl Record Bowl gives you all the directions to make one of these bowls! 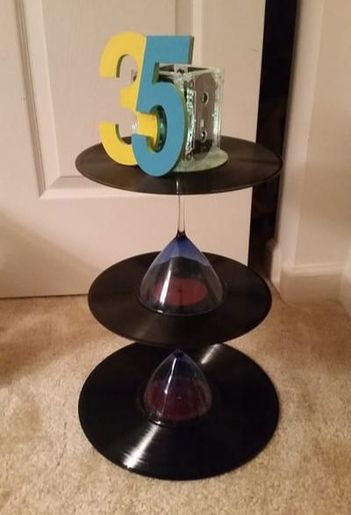 Record Cupcake Stand: I used this for donuts and cupcakes. To make these you just need records (found at local thrift stores), wine flutes, one centerpiece and hot glue.
 I had such a great time making decorations for this party. I am sure there were so many more projects that would have fit the theme!
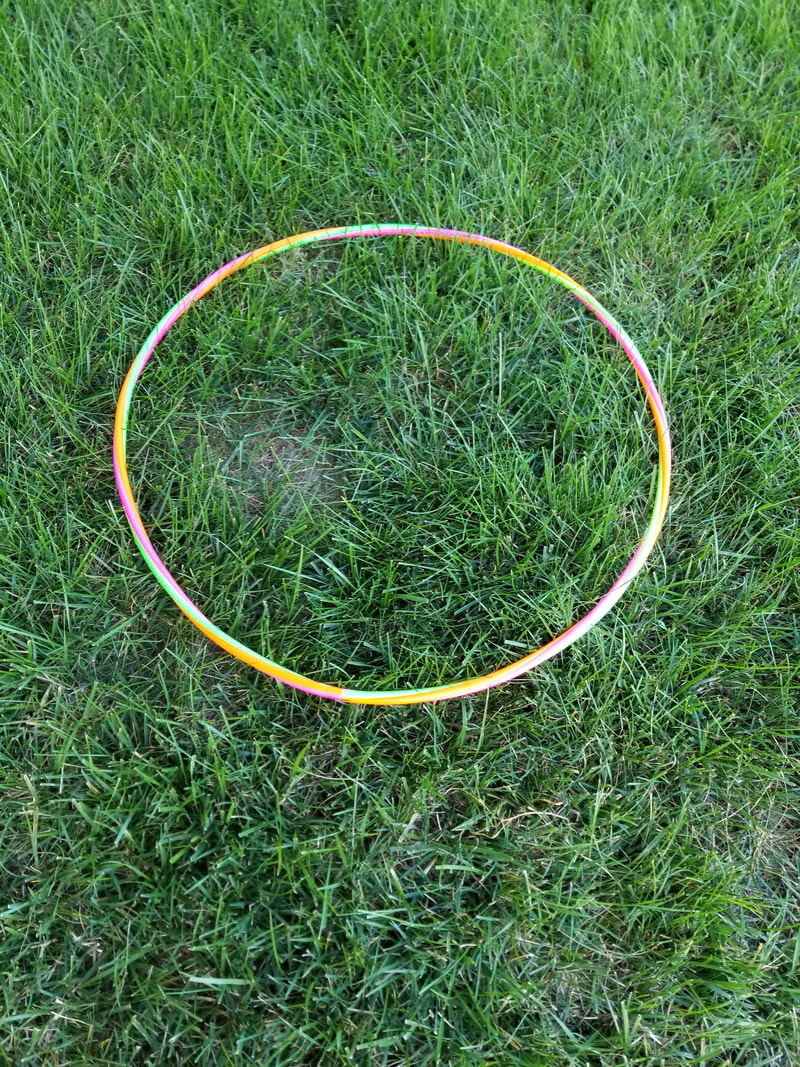
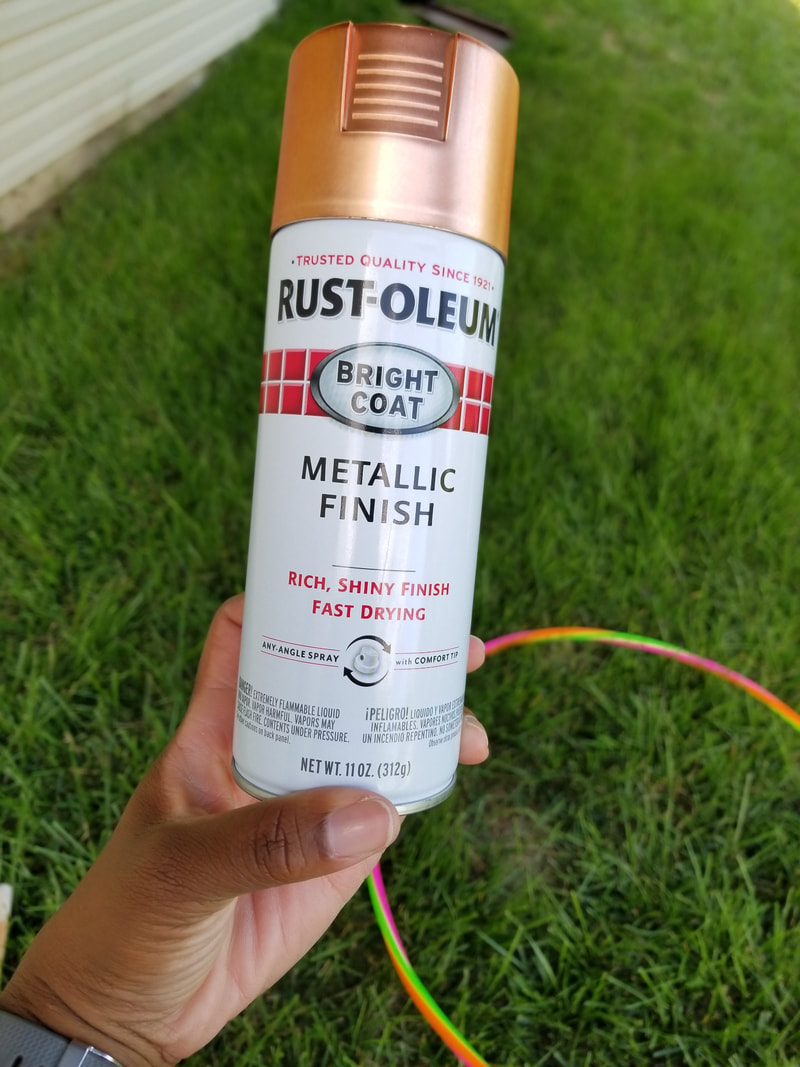
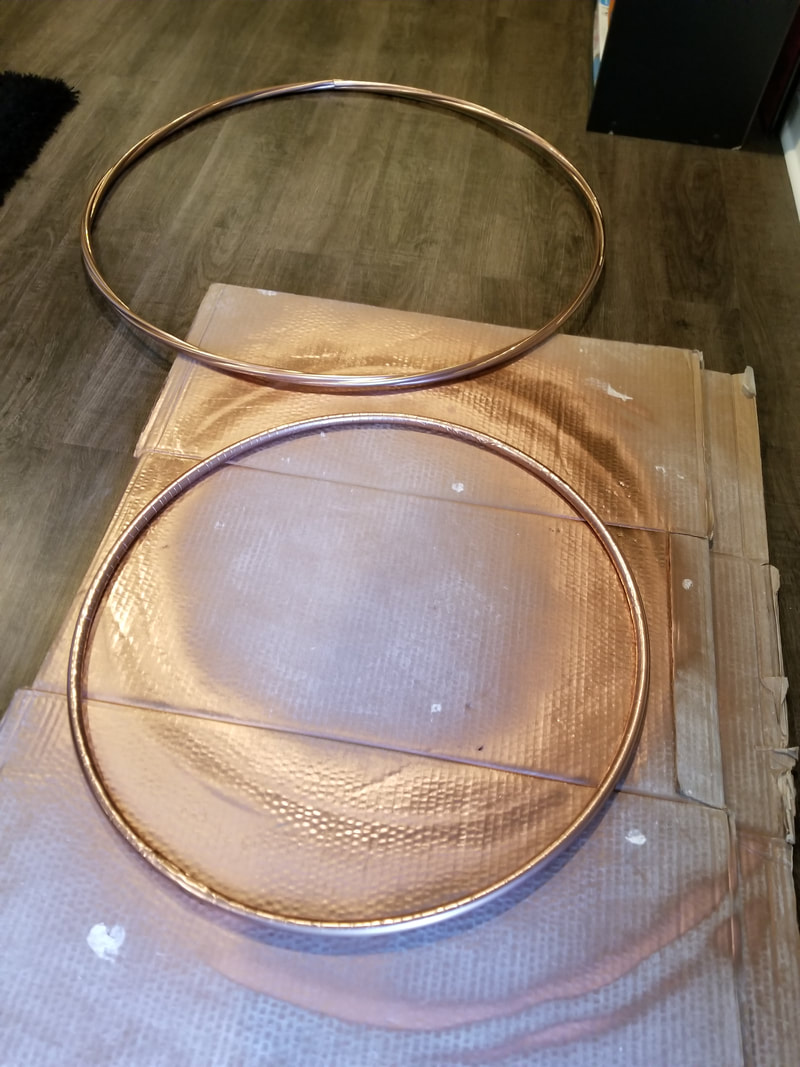
Check back soon for another DIY project! Happy Crafting! 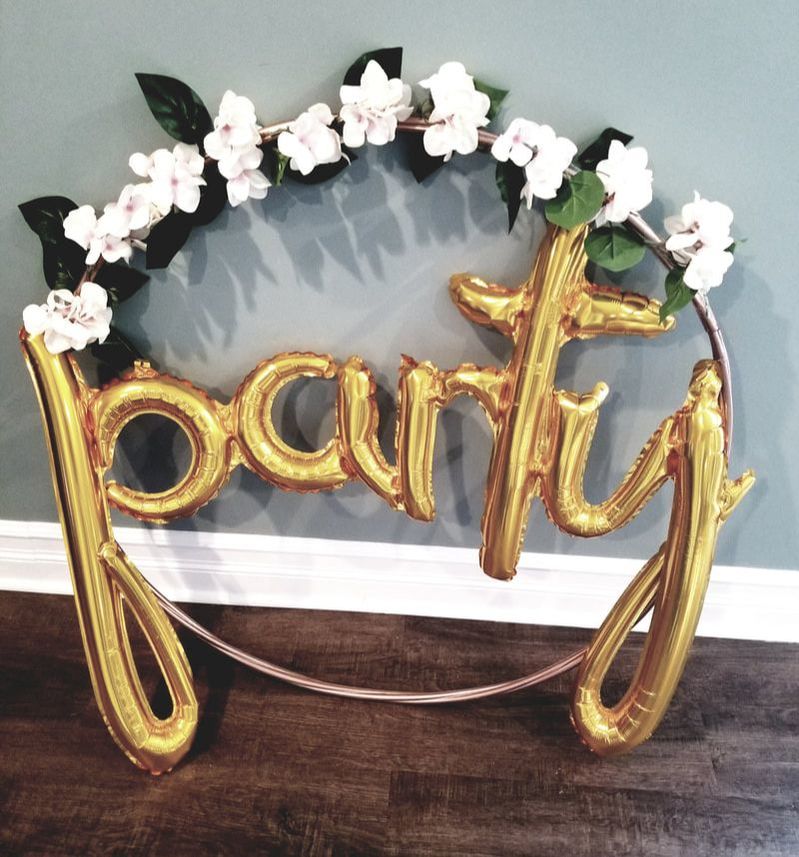 Here's how to make a hula hoop wreath. You can add words, balloons, lights flowers, on and on! Your creativity is the limit. Here is what you need: Materials: * hula hoop *spray paint color of your choice * fishing wire * balloons, greenery, flowers, lights, etc.
Spray paint the hula hoop in desired color and let it dry completely. Once you have your color it is up to you how you want to decorate the hula hoop. * Laying the hula hoop flat and place the letters in desired position. Attach to hula hoop with fishing line. *Adding faux greenery and flowers: place on hoop and secure with floral wire. 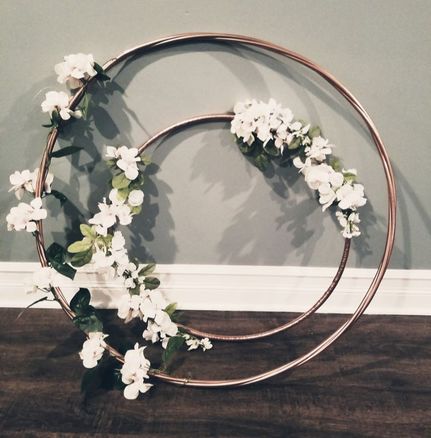 HGTV How to make a Hula Hoop Word Wreath has all the materials and directions you need to make an awesome wreath. 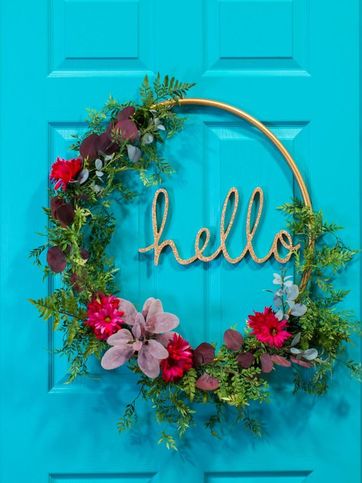 Check back soon for another DIY project!
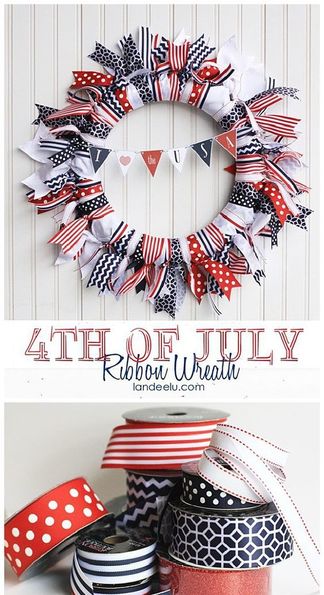
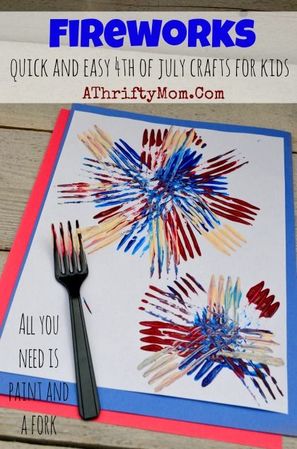
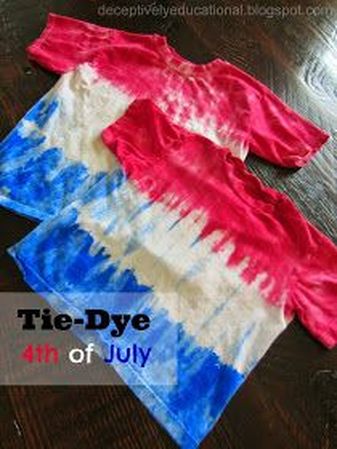
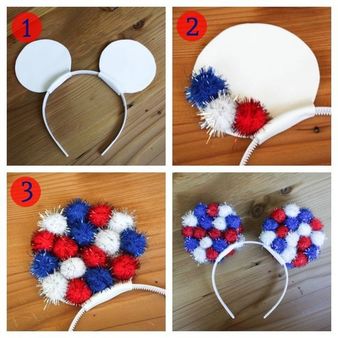
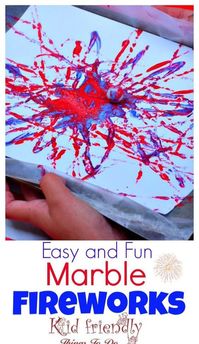
Happy Crafting!  Let's get crafty for the 4th of July? Looking for an activity to get the kids excited for the 4th? Or do want to add a little DIY to the celebration decor? Here are some crafts perfect the 4th of July!
We'd love to see some of your fun 4th of July crafts! Leave us a comment or a pic of your favorite craft!
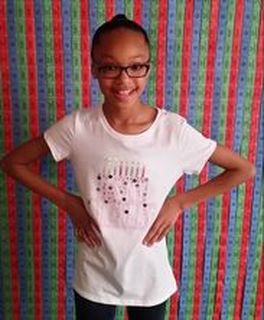
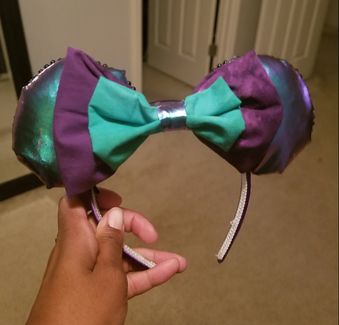
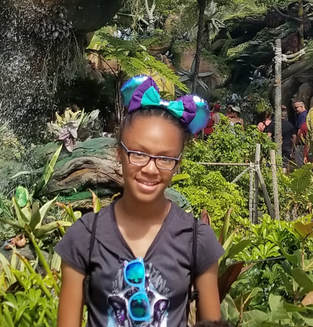
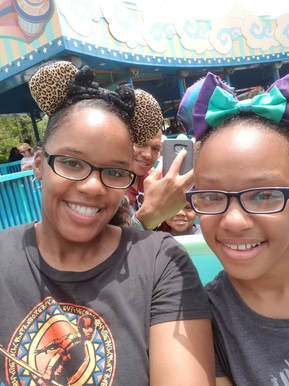
Have fun crafting!!! 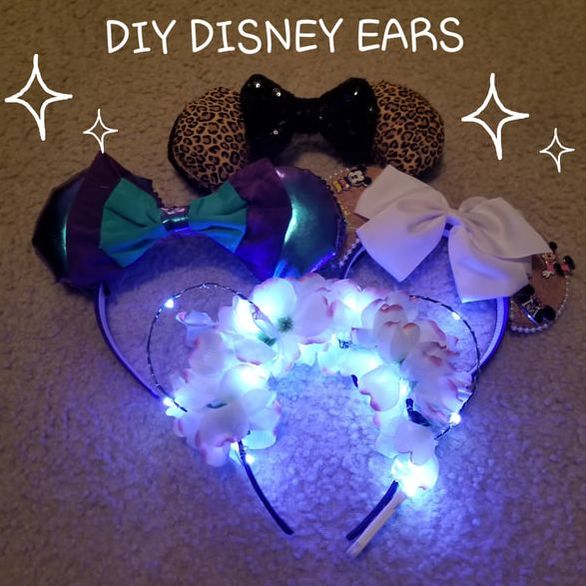 School is starting soon and this summer has been a blast. The highlight was our Disney vacation. Yep! Another Disney vacay in the books! It was a blast a hot, busy, exciting blast! We went to Animal Kingdom and Magic Kingdom and to celebrate this trip I thought I'd make some ears for us to wear in the parks.
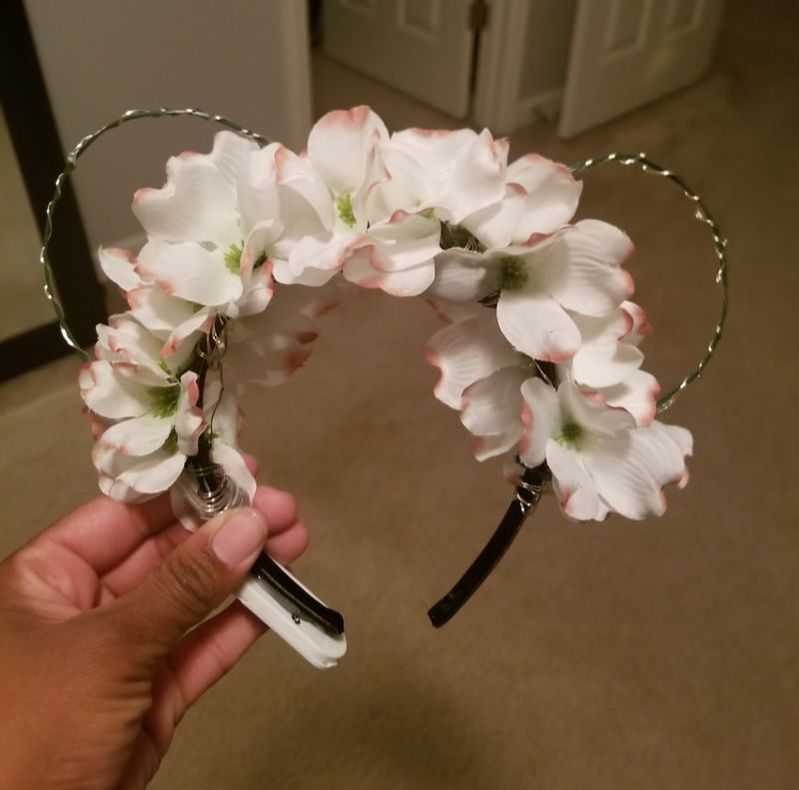
Animal Kingdom is one of our favorite Disney Parks. We really love Pandora. These ears are definitely inspired by the Pandora plants and flowers.
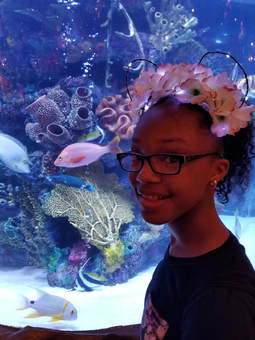
This year we are going to visit Pandora in Animal Kingdom during the day and come back to see it lit up at night. My daughter is super excited to wear these Pandora inspired ears at night!
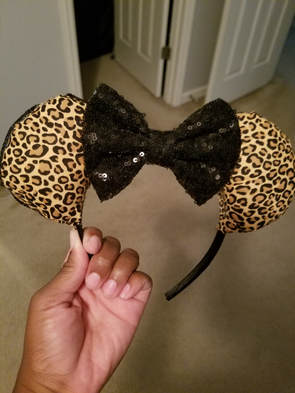
My Animal Kingdom ears have fun animal prints with a little sequins to add some sparkle.
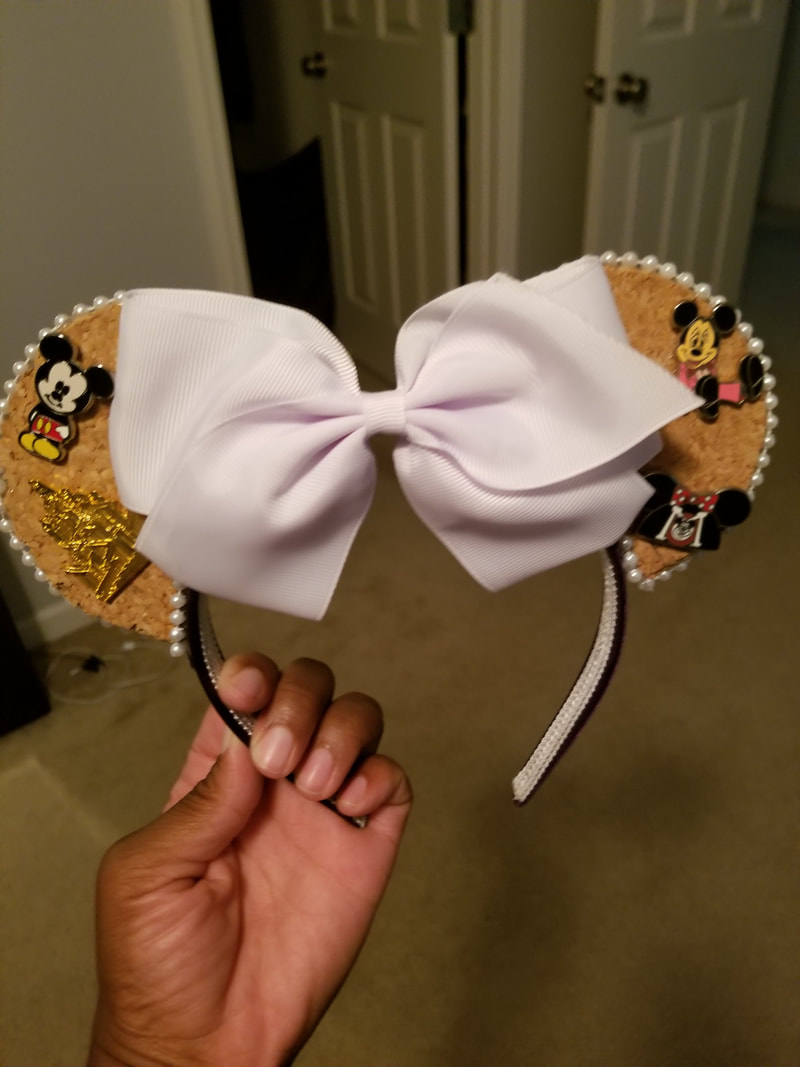
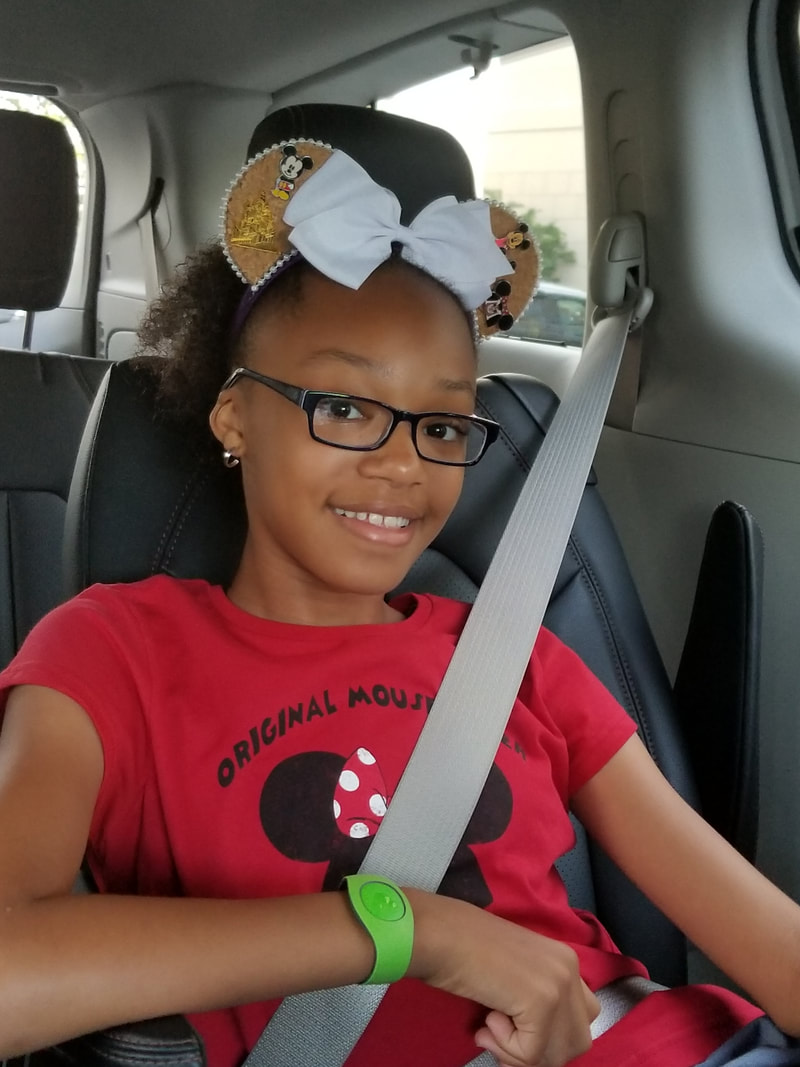
My daughter got into pin trading on our Disney trip last year. She absolutely loved it. These ears are inspired by the pin trading phenomenon. Here is a video that I used to make some of the ears. It's the same process for each set of ears. Check back soon for another DIY project!
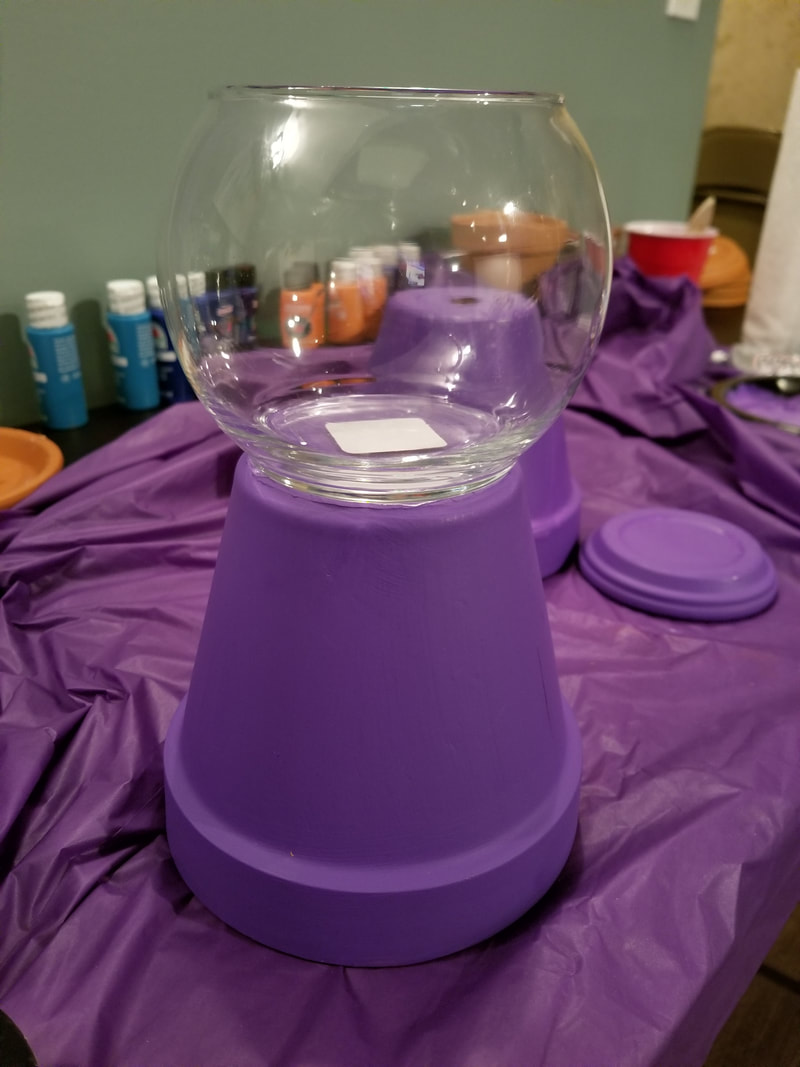
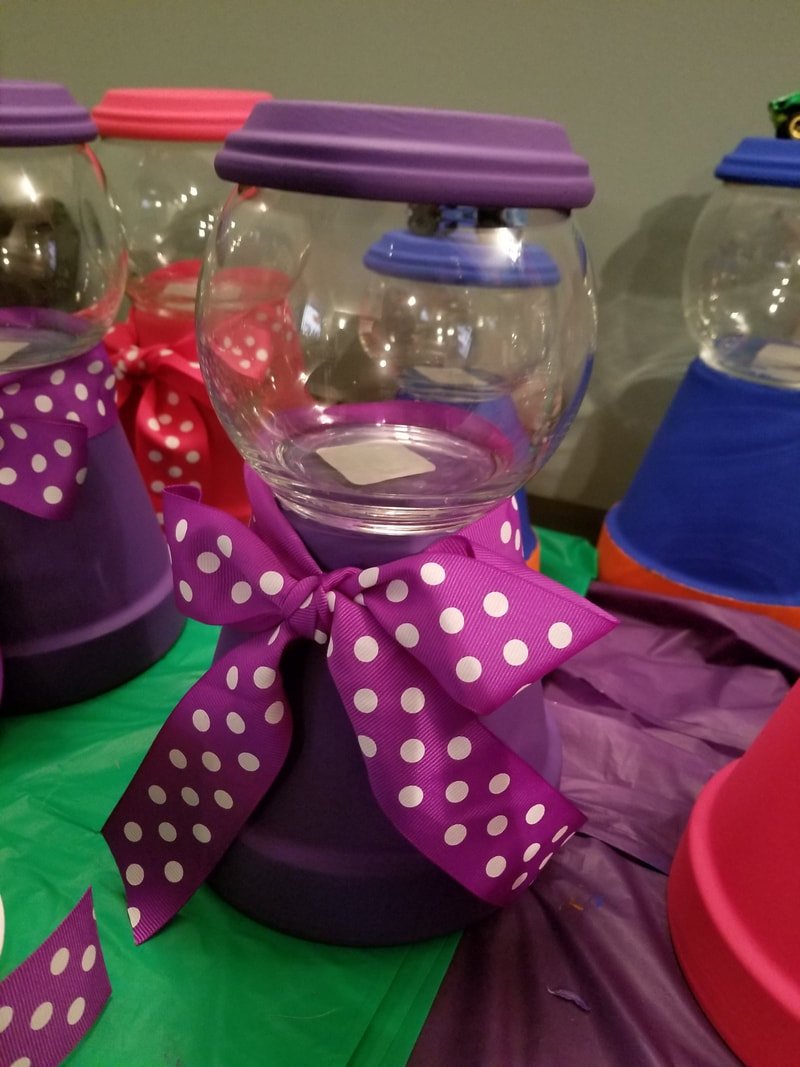
Happy Crafting!  I love making things for my kids, nieces and nephews. With Easter around the corner I wanted to DIY something special for them. I decided on these candy dishes. There are a lot of tutorials such as: http://www.prettydesigns.com/diy-ideas-candy-storages/ and Old Time Pottery. Here is how I made my candy dishes... Materials ~ terra cotta pot- (I got mine from Home Depot) ~ terra cotta pot tray-(I got mine from Home Depot) ~ glass "fish bowl" dish (I got mine at the Dollar Tree) ~ wooden knob or other item to decorate the top ~ craft paint in your choice of color ~ E6000, gorilla glue, hot glue ~ ribbon Paint pot, tray and wood knob if you used one. Be as creative as you want to be. You can use stencils, multiple colors, different designs you name it. Once the paint is dry turn the pot upside down so the bottom is at the top. Glue the glass bowl to the pot using gorilla glue, E6000 or hot glue(hot glue may not be the best option- I had a few bowls that wouldn't stay attached with the glue and we almost had a huge mess on our hands when I picked it up) . Turn the tray upside down so the bottom is at the top and glue the knob or item chosen. I used a hot glue gun to glue my items to the tray. Give your item and bowl plenty of time to dry then fill the bowl with candy. Top off the candy dish with the lid and a bow and "Boom" all done!
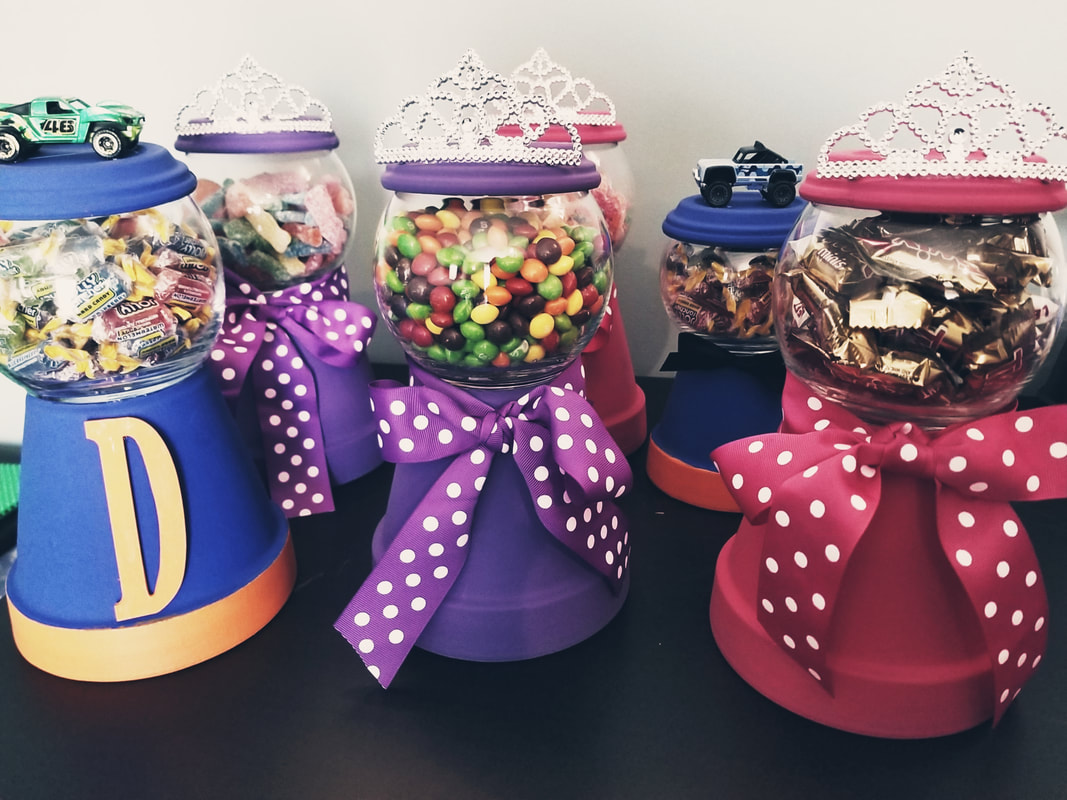 These awesome candy dishes perfect for parties (candy bar) and gifts for friends and family.
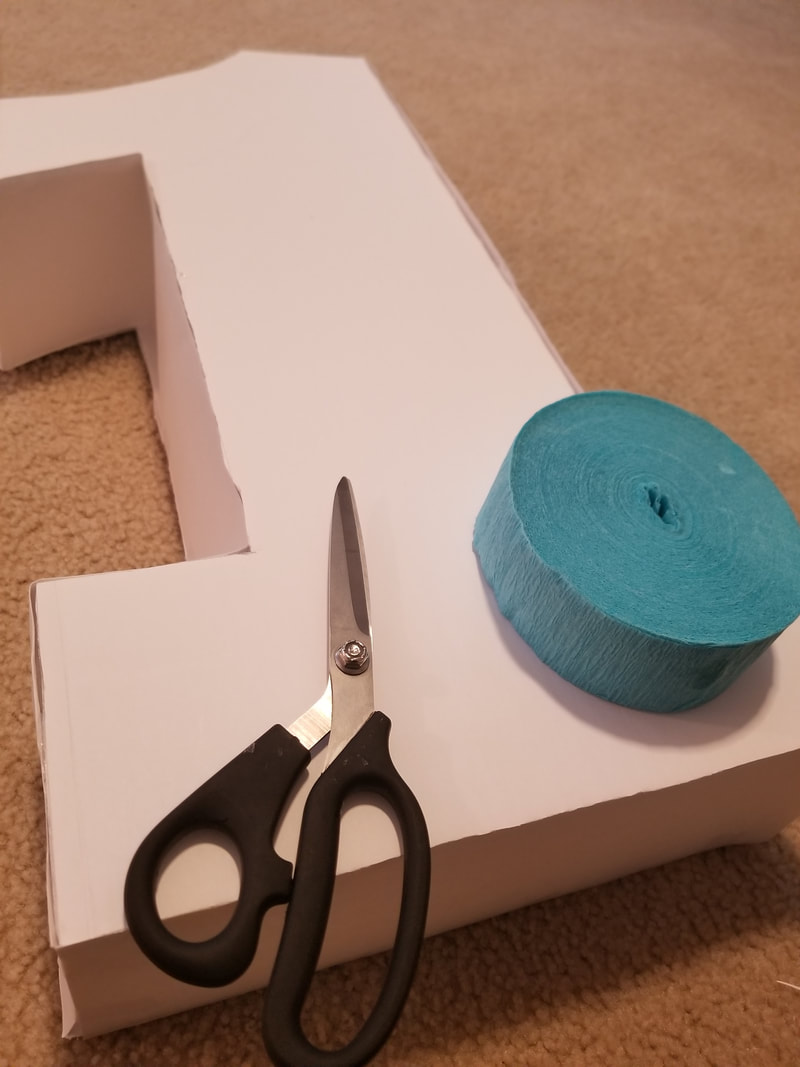
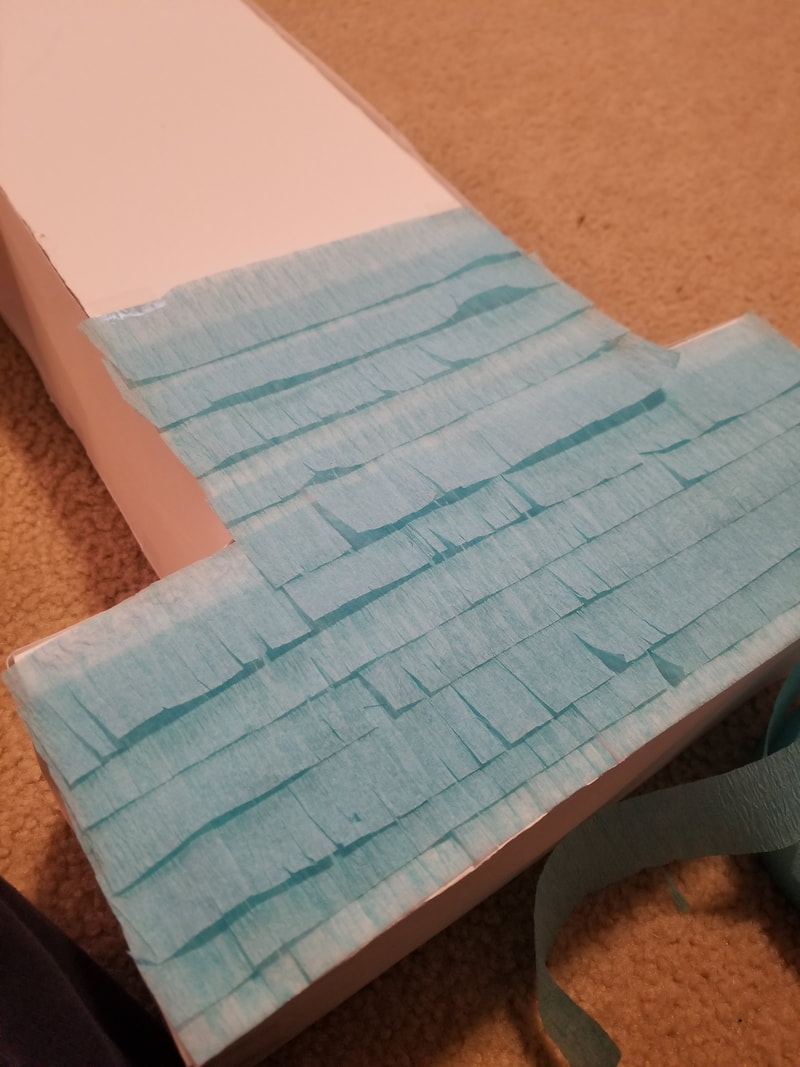
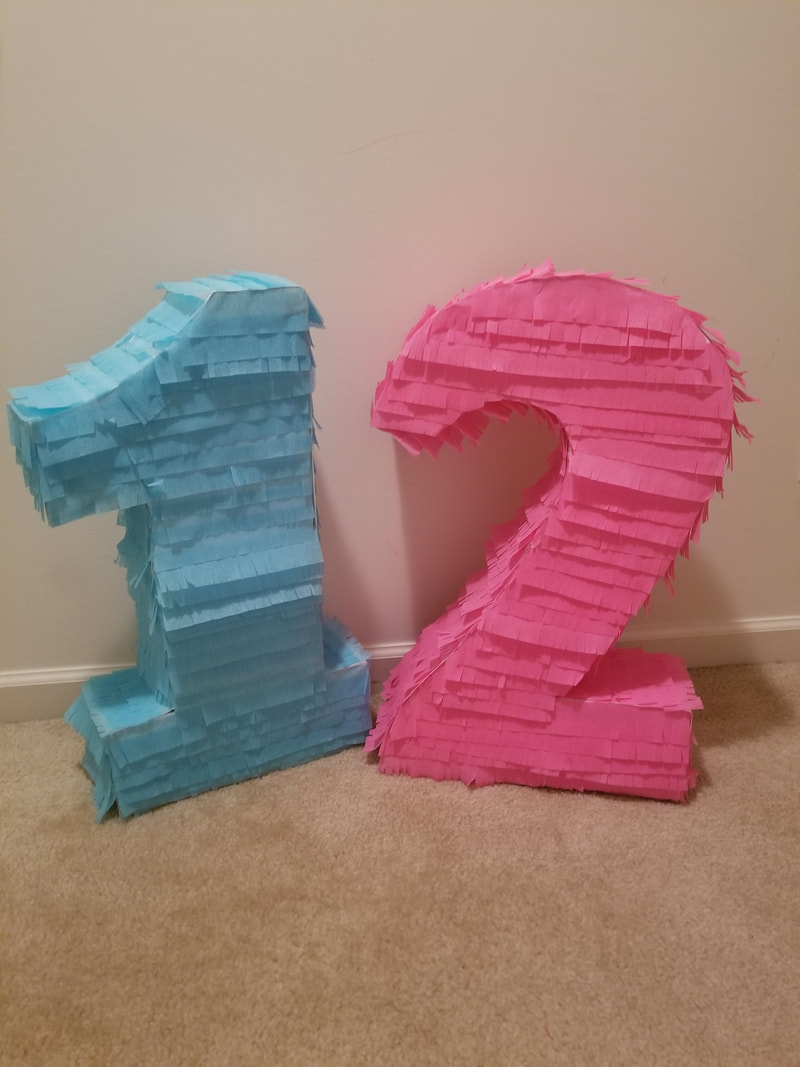
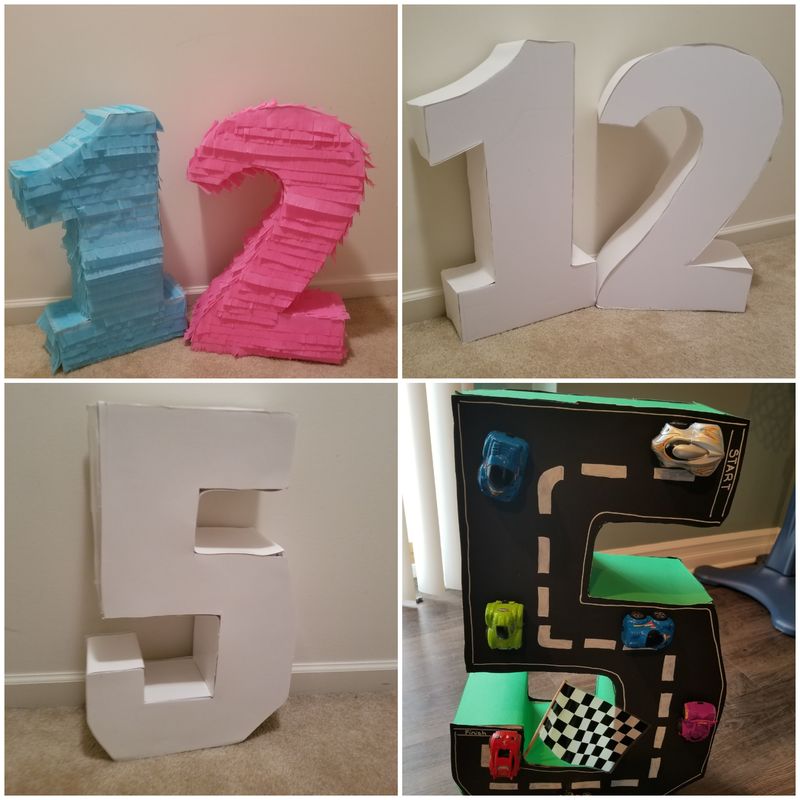 Since my babies are having a joint birthday party I want each of their tables to be specially decorated for them. I made these giant numbers for them and now I need to decorate them. Check out how to make these giant DIY numbers here. Jaylah's 12I was given the suggestion to decorate the 12 using streamers. since it was my first time making the numbers there were some imperfections I needed to cover. Materials: Streamers Scissors I cut strips of streamers the length of the number then cut small slits on the streamer. I taped the streamers to the number starting from the bottom and working my way up the number.
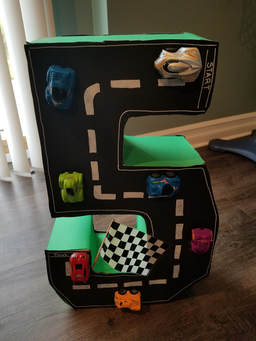
jaxson's 5Materials: Green and black construction paper Tape White paint pen Toy cars I covered the outside of the 5 with the green paper to represent grass and the inside of the 5 black to represent the street. With the paint pen I drew on the street and then hot glued cars to the street.
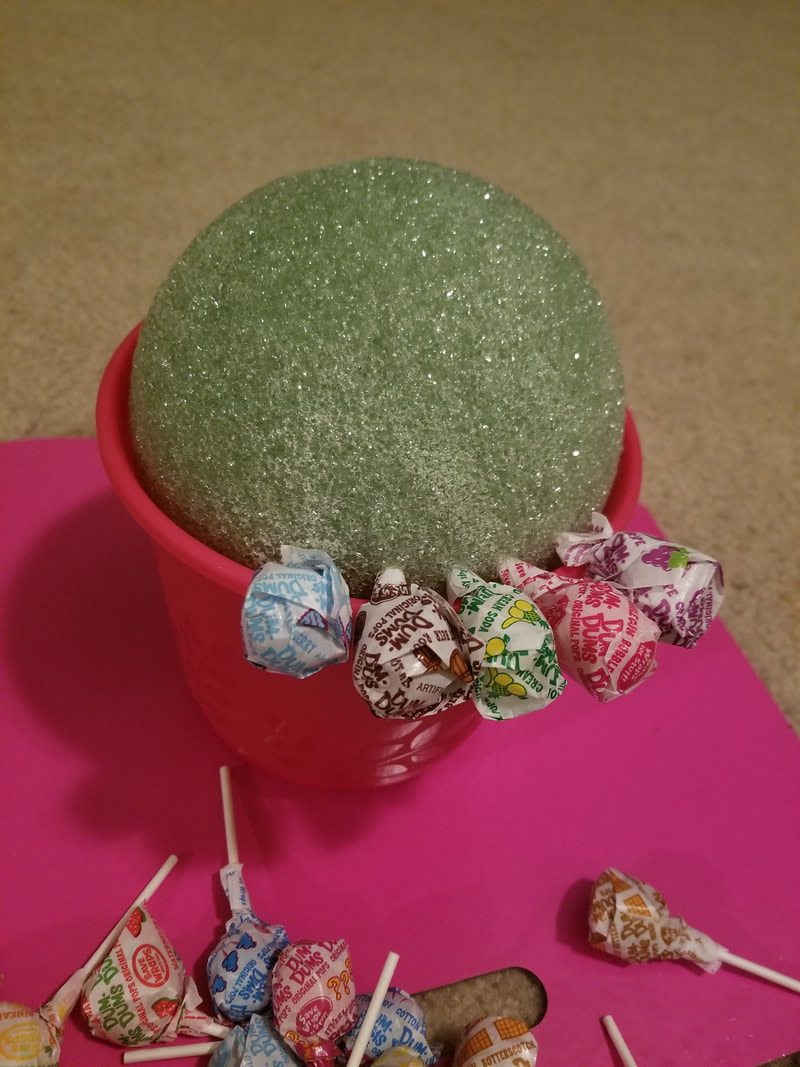
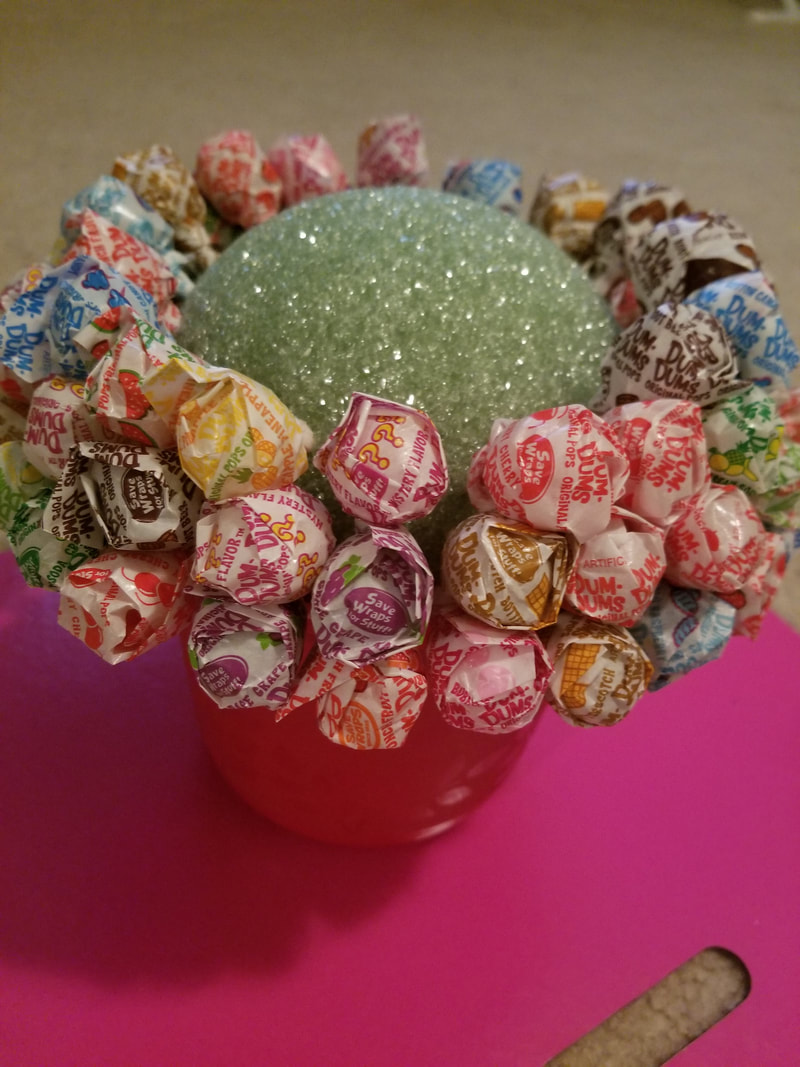
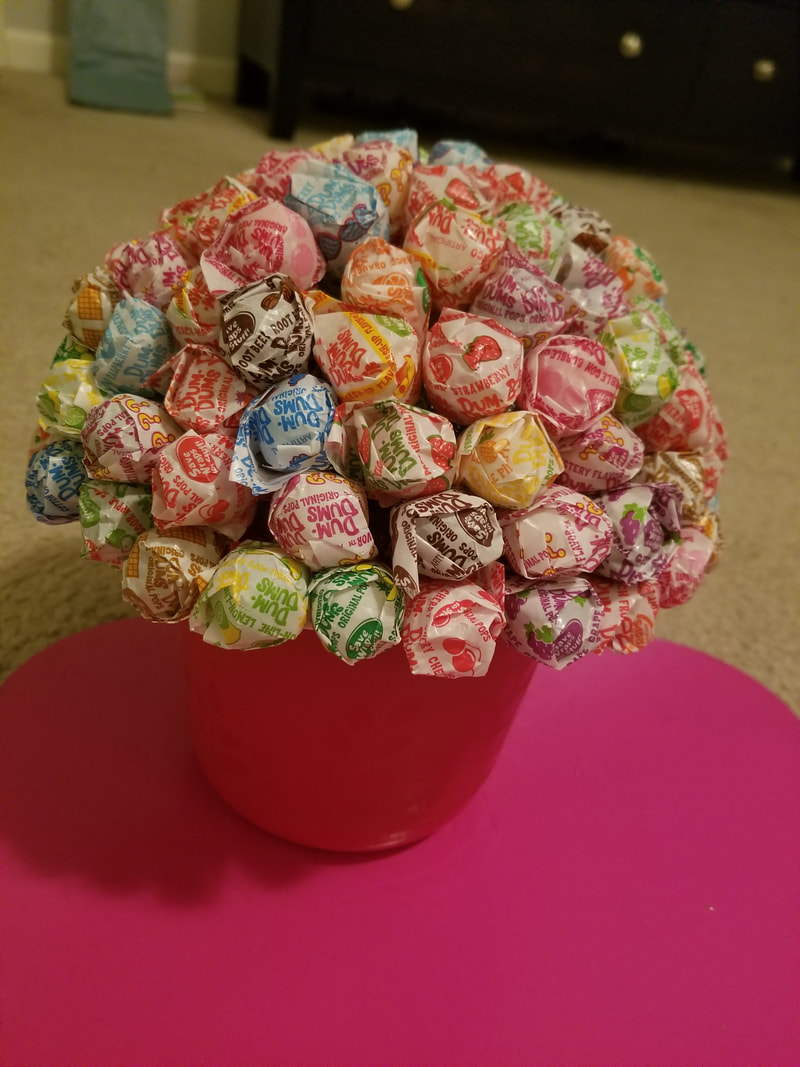
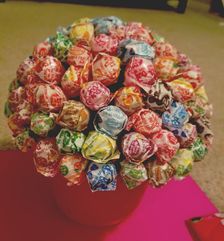 I wanted something different for my daughter's cupcake themed party table. I thought candy centerpieces are perfect. Tutorials for these centerpieces were really easy to find. Here's how to make a yummy Dum Dum centerpiece. 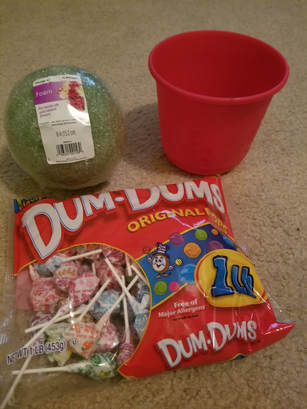 Materials 1. Some type of base, pot, or vase. I found pink flower pots that worked perfectly at the Dollar Store. 2. Styrofoam Ball- I used a 6 inch from Walmart. 3. Two 1lb bags of Dum Dums. - I used a bag and a half. Step by Step 1. Put the styrofoam ball on top of the the container you've chosen. 2. Next start inserting the lollipops. Starting around the bottom is much easier. I inserted the lollipop sticks straight in. 3. Keep inserting the lollipops, staggering them in each round to be sure you fill in all the spaces. Do this until the entire foam ball is covered.
How easy was that? My daughter loved it! It did turn out pretty cool huh?
|
Archives
December 2019
|


 RSS Feed
