 So the first week of school has come and gone and I promise you there is no tired like a teacher after the first week of school tired. Principals and staff like to have massage and yoga gurus come in at the end of the school year to help calm teachers and get them energized enough to finish the school year. Well, I say that they bring them in at the beginning of the year. This got me thinking PAR-TAY! A spa themed party could be the perfect party for that tired mama (or daddy) who survived the summer and has now sent the kiddos back to school or that exhausted teacher who has now successfully completed the first exhausting week of school. This could even be a great birthday party theme! Here are some ideas I found!  On a budget? No worries. Here are some great ideas on how to host a spa party with items found at the Dollar Store! 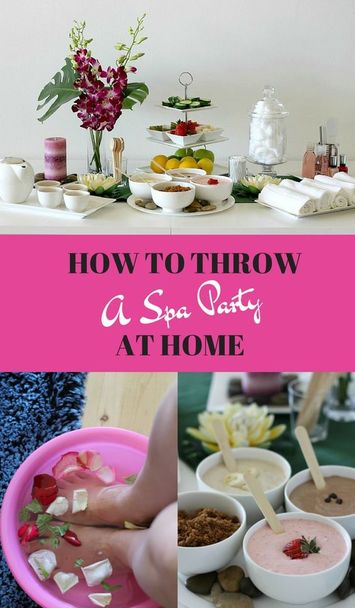 Want to treat some hard working friends to a Spa Day at home? PrettyMayhem has some great ides from decor to food on how to pull it off! 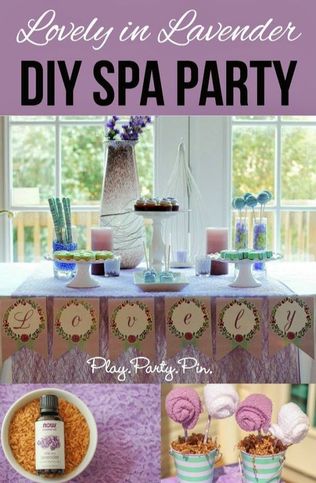 The Lovely in Lavendar DIY Spa Party has tips for a fun party favor and spa stations that will have guest using their creativity while having a blast.
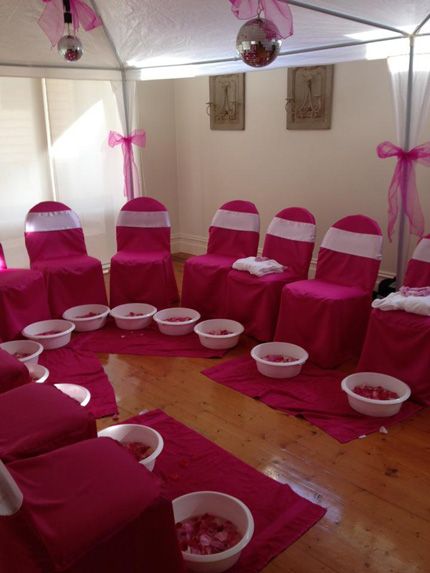
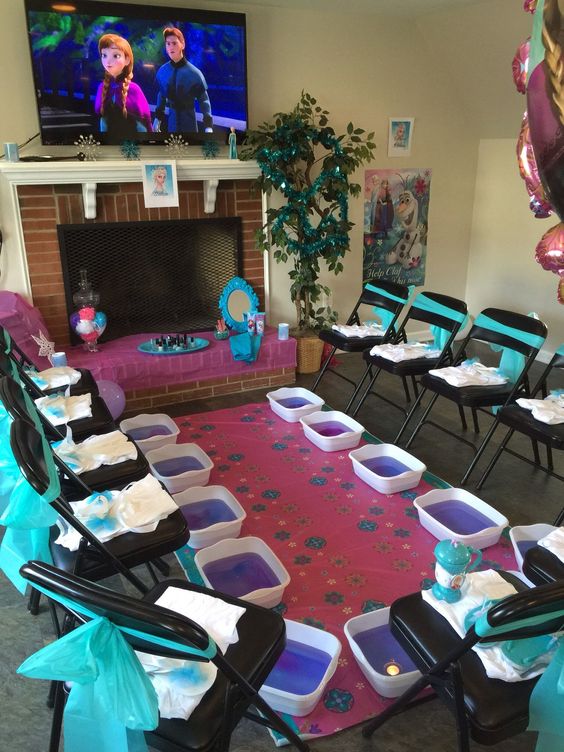
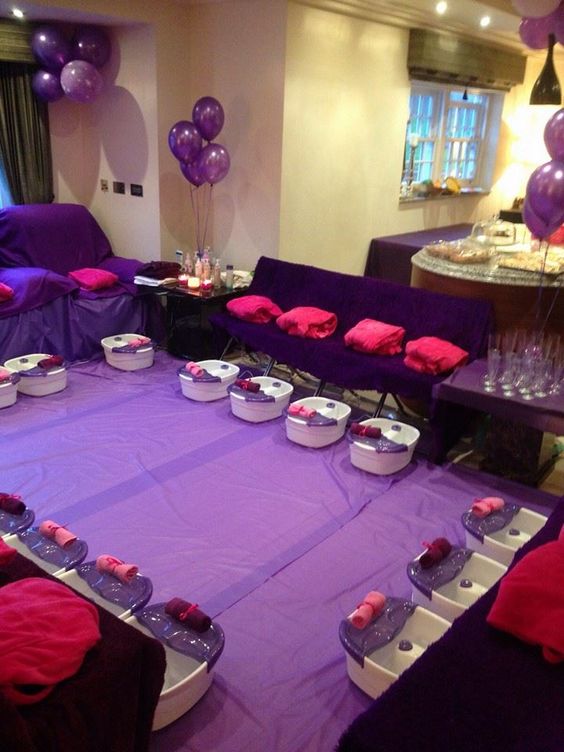
Wanting to throw a Spa Birthday Party? Here are some amazing set ups that you could do right at home for pedicures and massages.
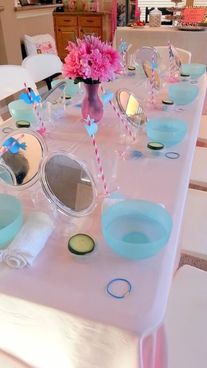
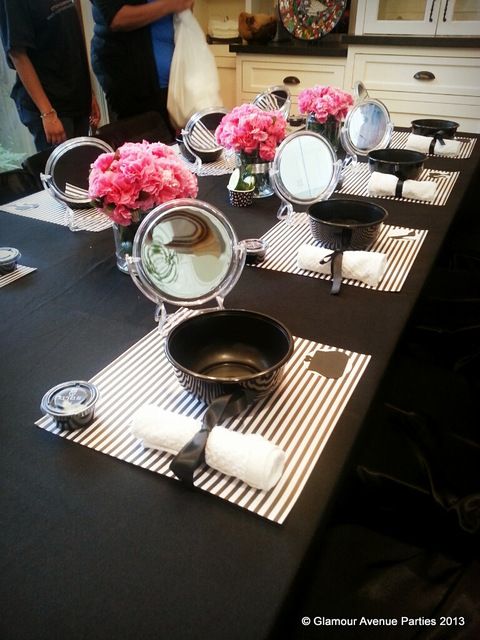
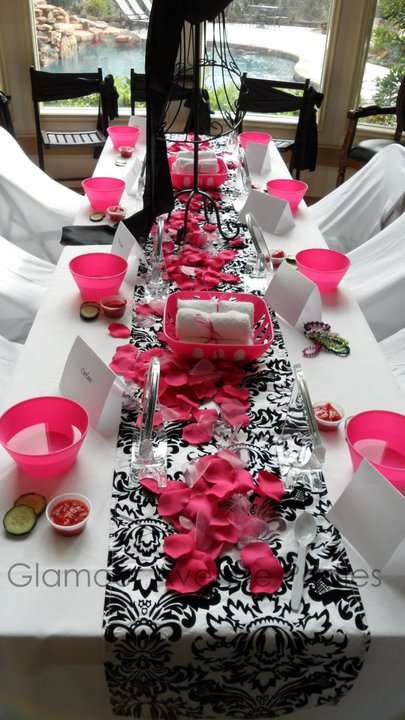
Here are some spa themed tablescapes for facials and manicures. 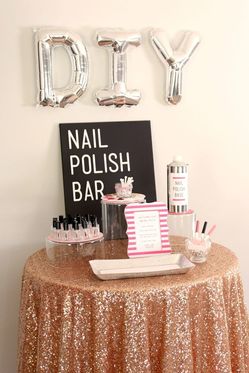 Super cool station that can also be an amazing party favor.  Check out my Parties Board on Pinterest for more ideas on how to throw a great Spa Day Party for any occasion.
0 Comments
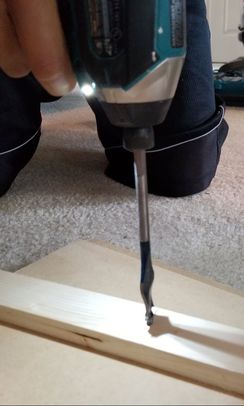
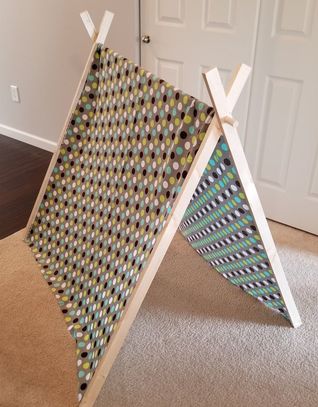 It's time to start planning the next slumber party for the cousins. The camping theme is going to be a hit! I want to start with the tents for the girls to sleep in. I should have put this post under Crafts but I am so excited about this party I thought I'd use the Party Blog for some ideas and the Craft Blog for others. Let's get started! Here's how to create the tent! 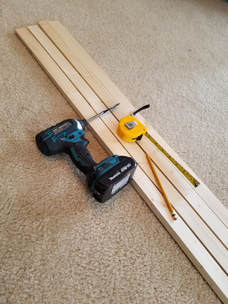 Materials: 4- 1” x 2” x 48” whitewood moulding 1- 3/4” x 48” poplar dowel drill with a 3/4” spade bit 2 1/2 yards of fabric measuring tape pencil (marker) 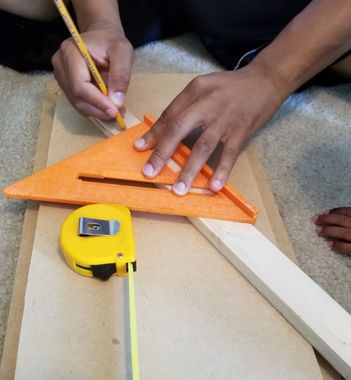 Step 1: From the top of each moulding, measure and mark 6'' down. I needed my husbands help with the first few steps!
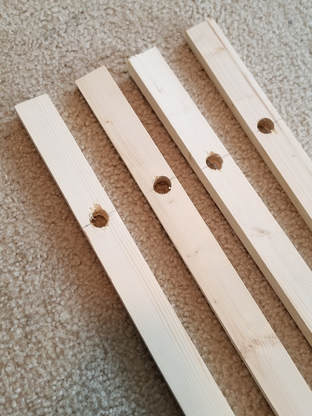
Step 2: With your drill and 3/4''spade bit drill a hole at your mark. Try to center it as much as possible. 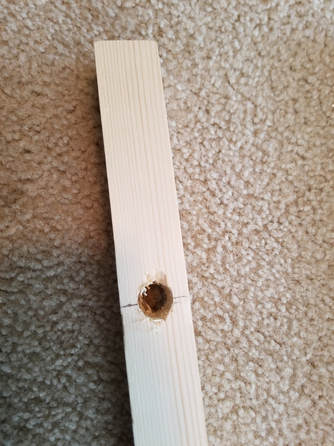 Step 3: Make sure the holes are lined up by placing two moulding pieces on top of each other. 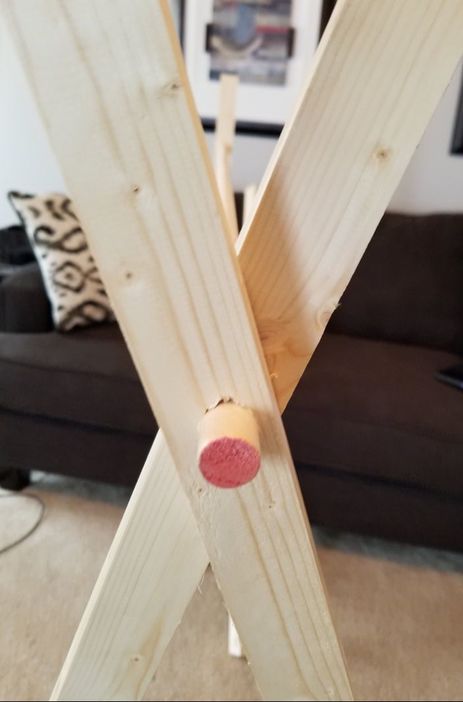 Step 4: Push wooden dowel through the holes of two mouldings. It should be a tight fit. 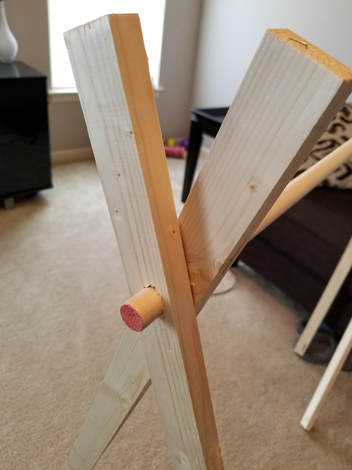 Step 5: Repeat step 4 and put together the other side with the two remaining mouldings
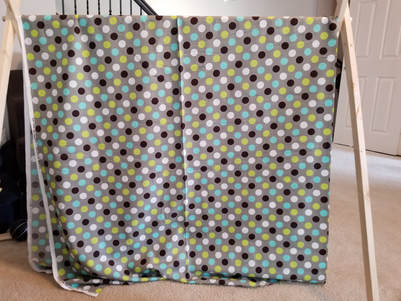
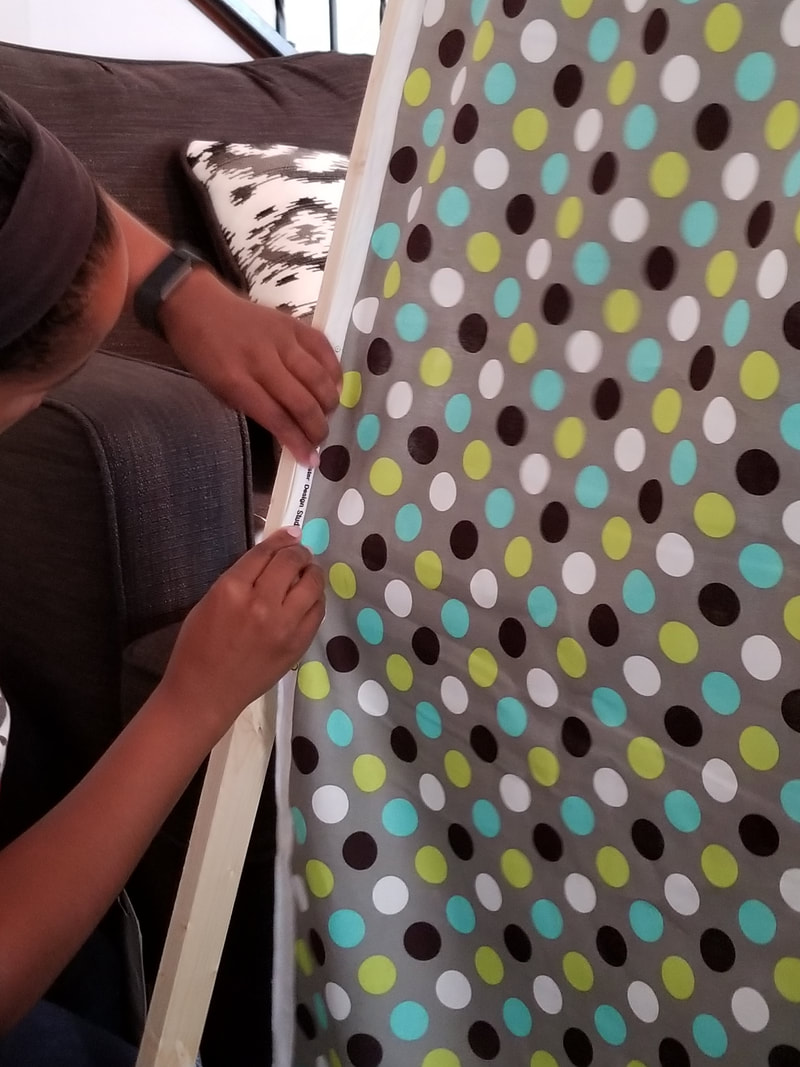
Time to cover the tent! I don't sew so I had to get creative. I used fabric I found on sale at Hobby Lobby. Drape the fabric over the tent. Hot glue the ends of the fabric to the moulding. It may be smart to go back with a staple gun just to be sure the fabric is attached to the wood. 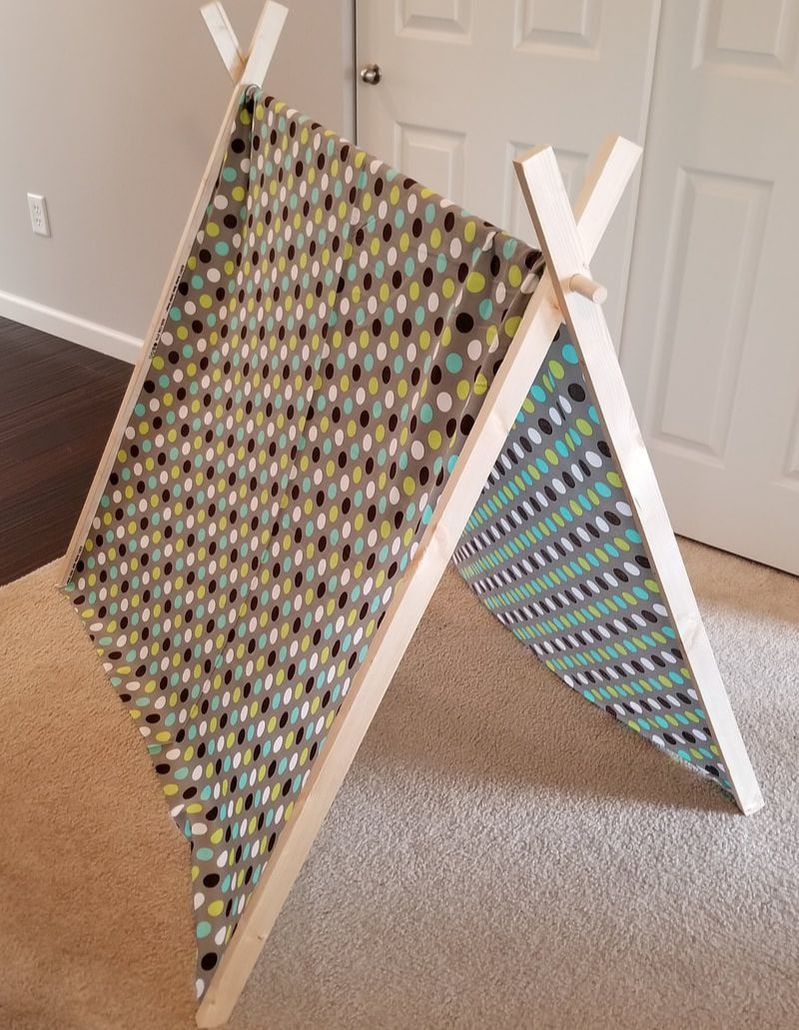 Whether you are making this for a comping themed party, sleepover or a reading nook I hope your little guy/girl enjoys their cozy space!
|

All About ME
I am Tanya, a 38 year old wife and mother of two. I currently reside in St. Louis, MO. I started Creative Celebrations as way to share with others my love for party planning. I hope that each time you visit you will come away with a tip, trick or new idea to make your event a CREATIVE CELEBRATION! Archives
May 2020
|

 RSS Feed
