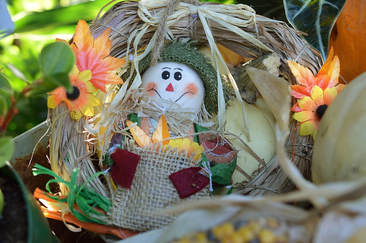
 Give your front door a little Thanksgiving love with these easy DIY wreaths. 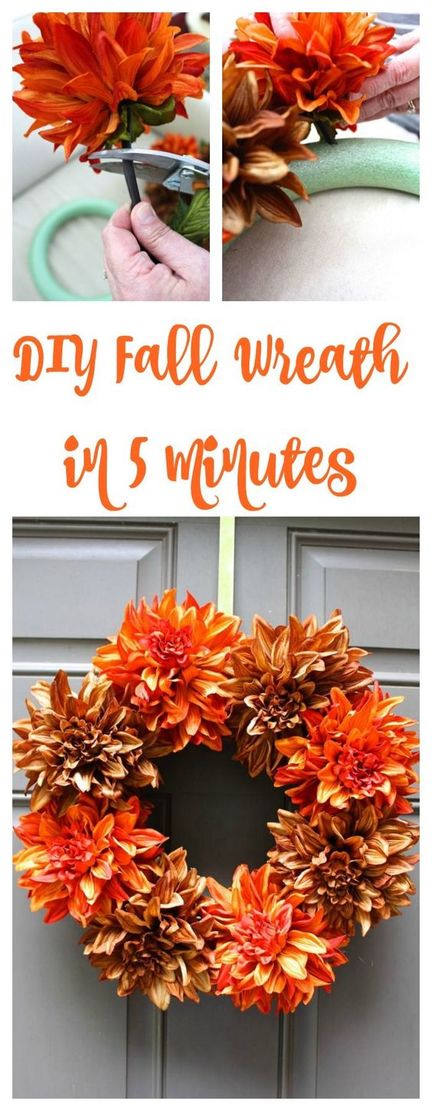 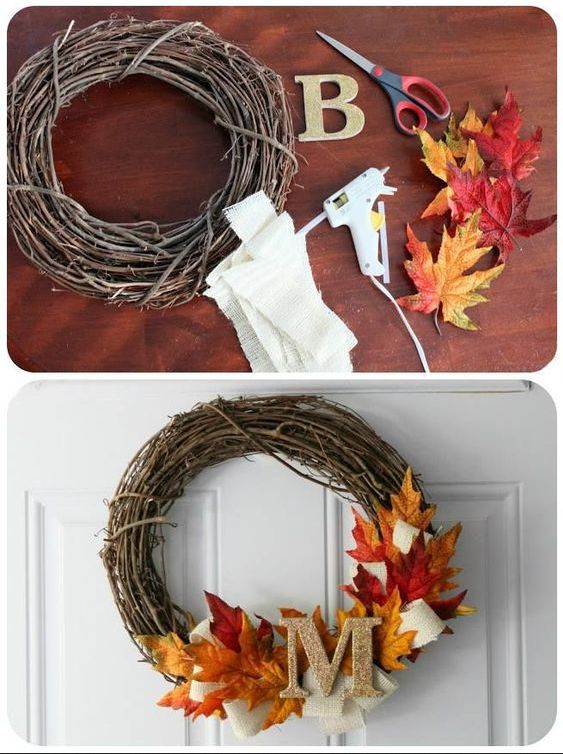 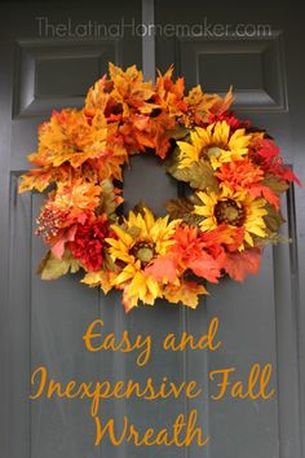
0 Comments
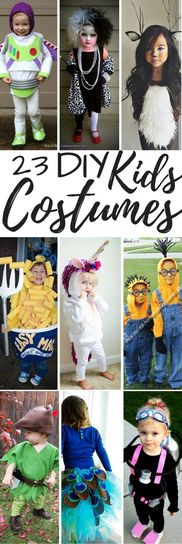
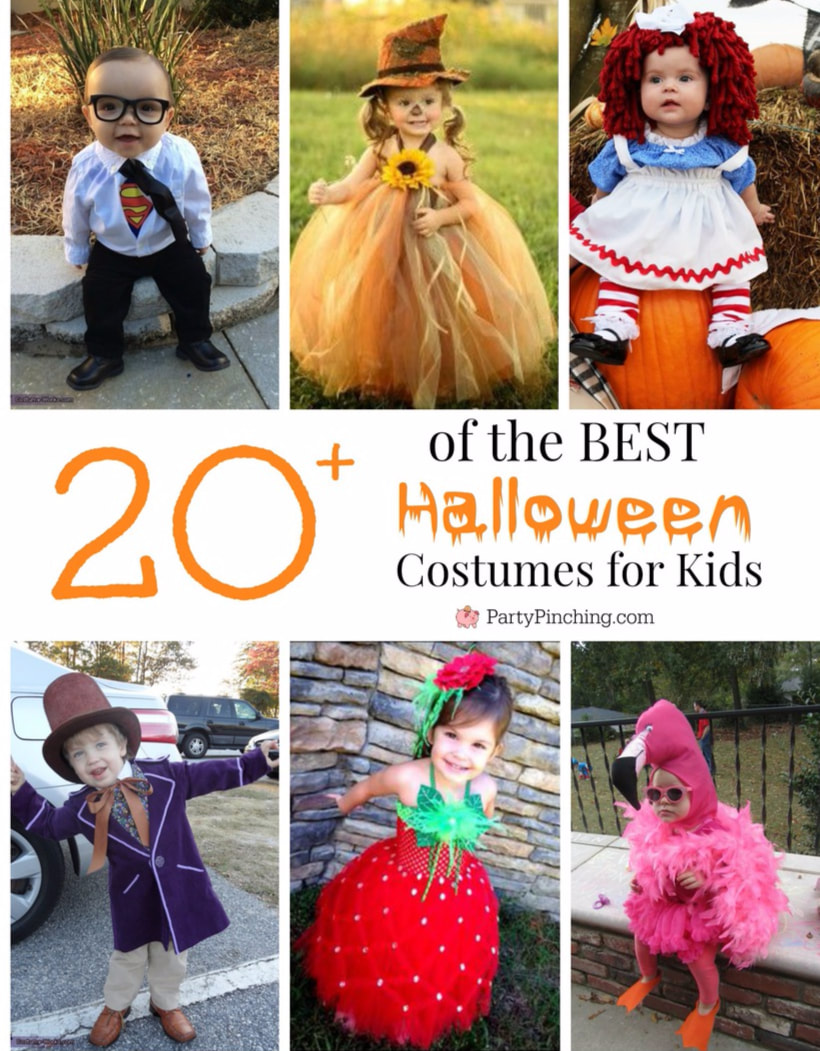
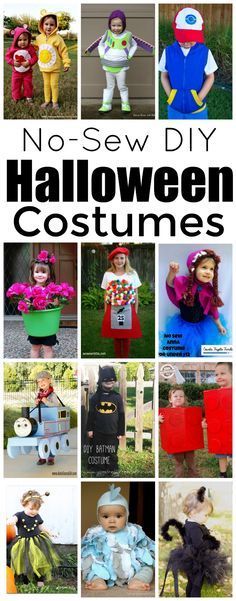
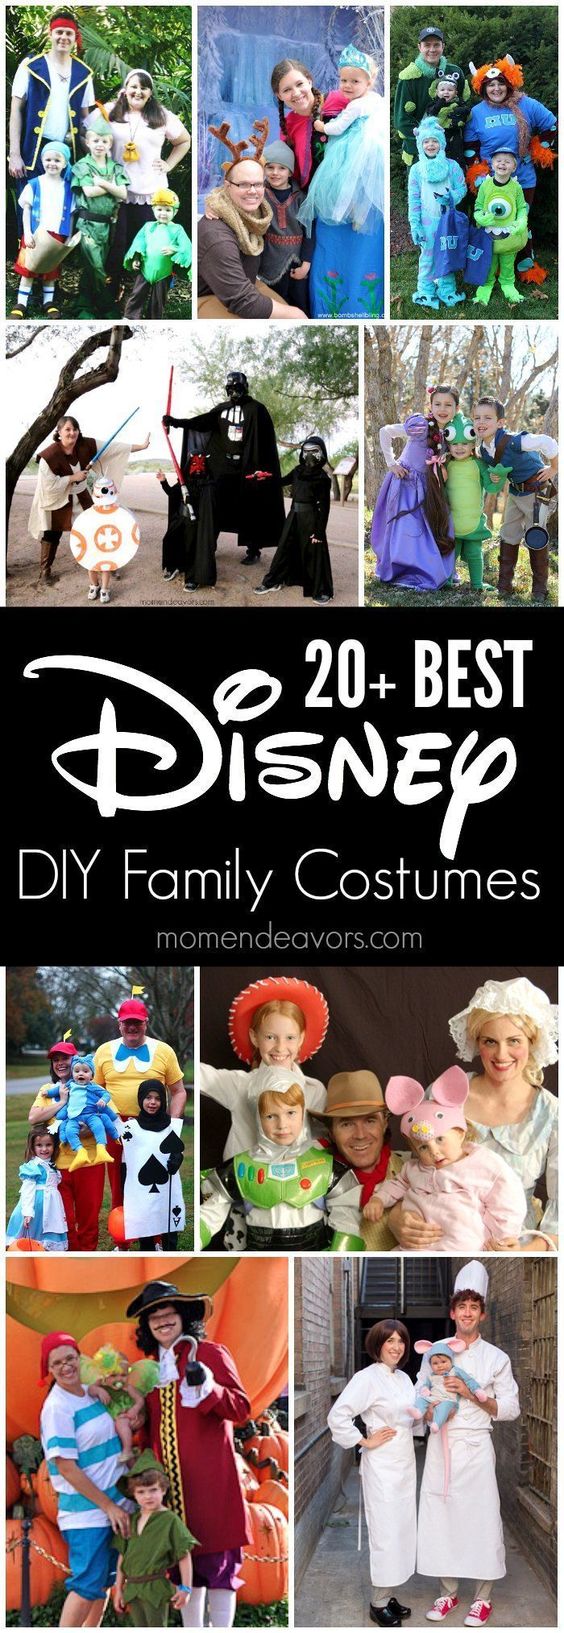
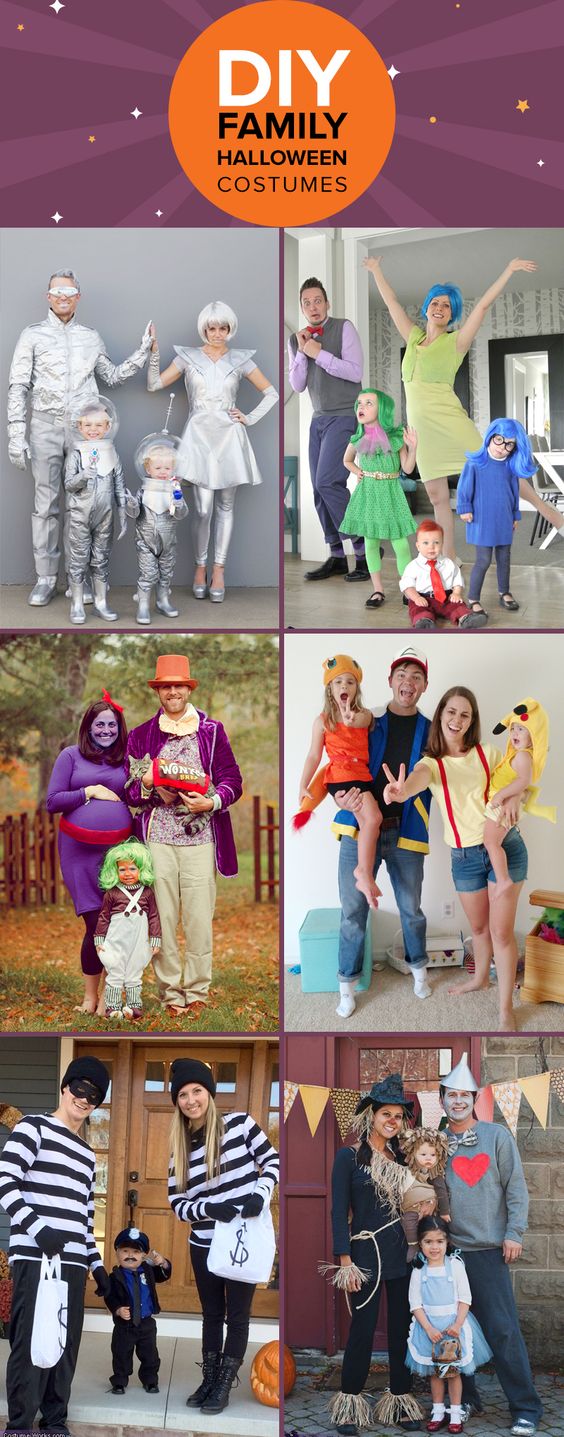
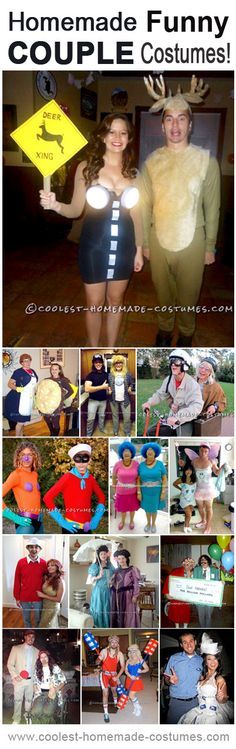
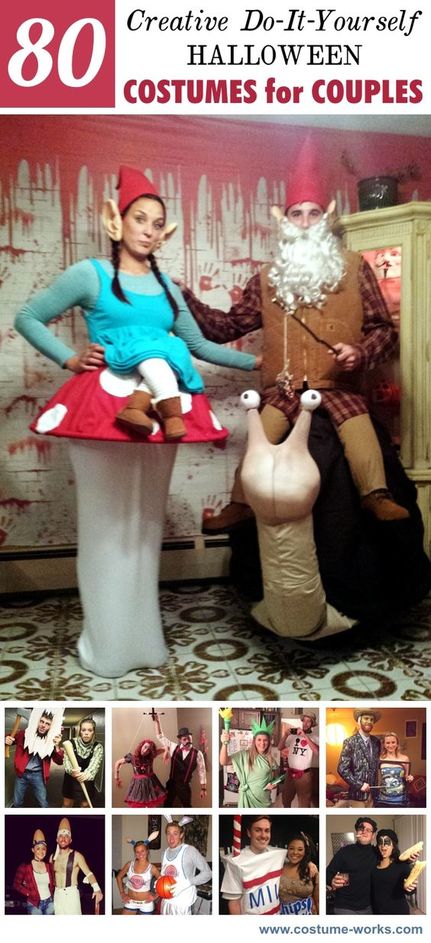
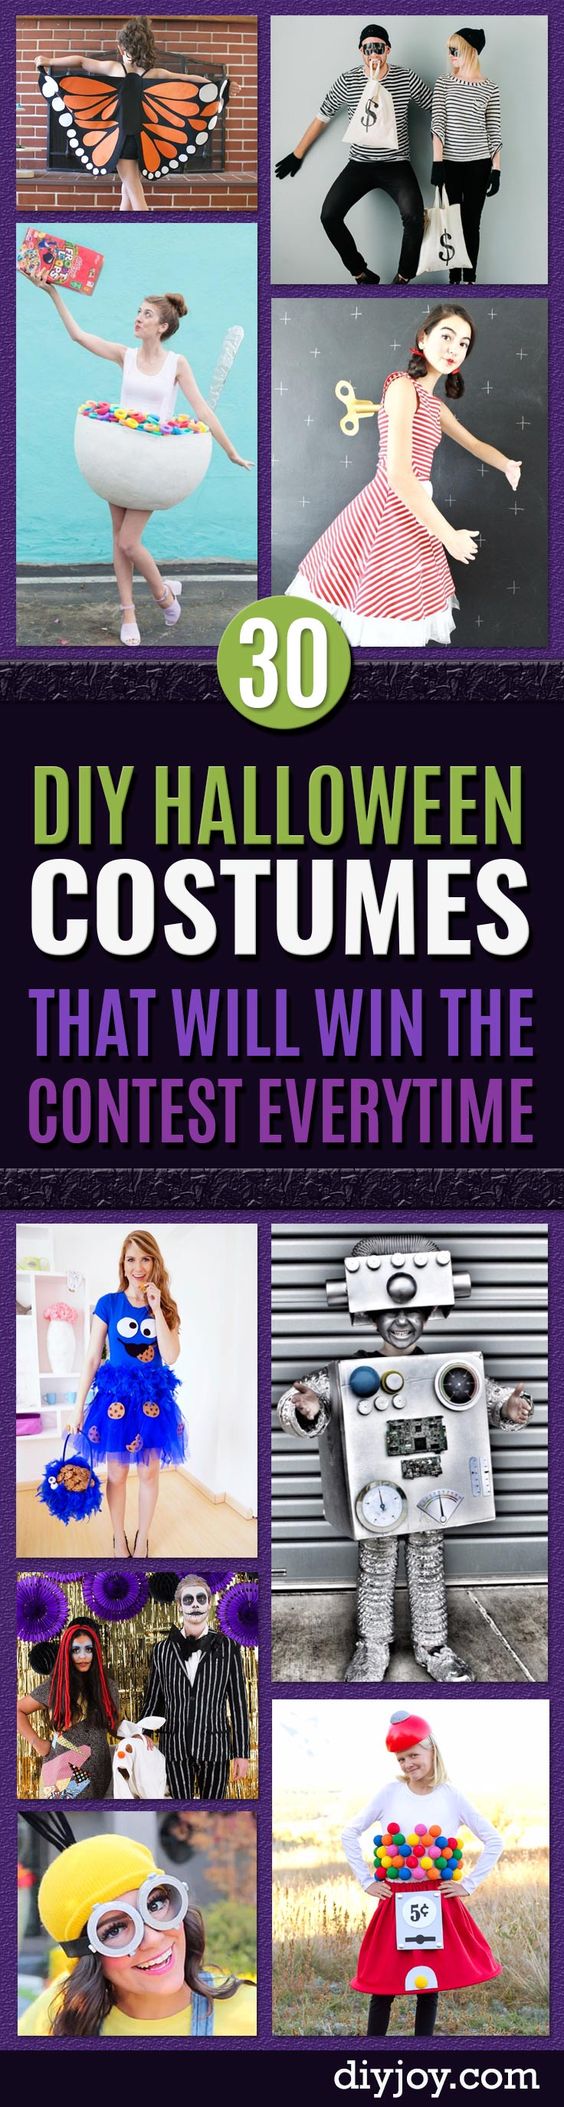
 With Halloween around the corner I thought It'd be helpful to do a post about some DIY costume ideas. Costumes whether for Halloween or for a costume party can be really pricey. What better way to be creative and economical buy doing it yourself!!! DIY for the kiddos
DIY for Adults
DIY COuple/Family
I couldn't help myself. Here are some super cool and creative costume ideas.
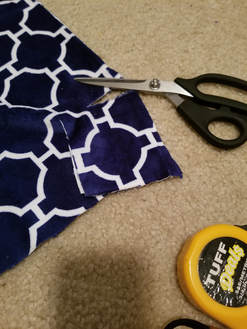
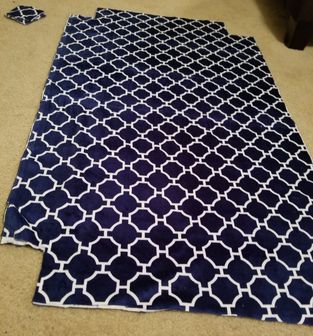
 Keep the kiddos busy with these fun Halloween crafts! Do you want to add some creativity to your next party with some balloon decor? Here is a great tutorial video on how to create an amazing balloon arch by The House that Lars Built. 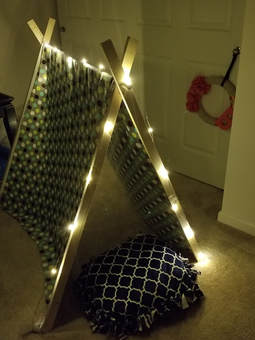 As I am continuing to plan for the upcoming Camping Indoors slumber party I keep trying to think of more ideas to make their tent experience even more fun and memorable. I found an easy tutorial for a no sew fleece pillow that will be perfect. I think they turned out pretty awesome! Let's get started shall we... 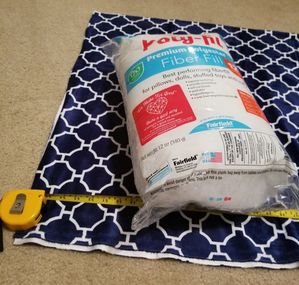 Materials 1 yard of fabric-fleece Poly-fil fabric scissors measuring tape 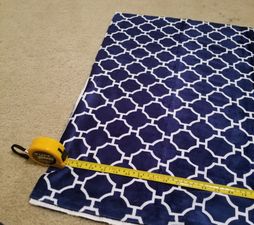 Step 1 Cut the yard of fabric in half and lay pieces back to back. Step 2 Cut out a "4 x 4" square from the corners of the fabric.
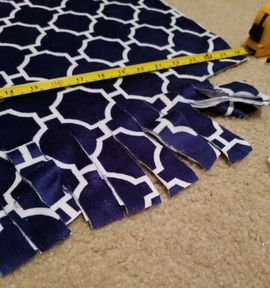 Step 3 Starting at any side, cut the side of fabric into 1'-1 1/2" strips. 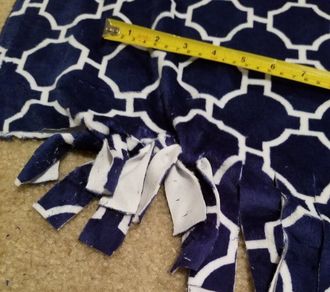 Step 4 Tie each set of strips (one strip from the bottom and one from the top) into a knot. Don't tie too tight as the fabric will bunch. Step 5 Once you've tied 3 out of the 4 sides and all but 10 -15 strips are tied of the last side start filling in the pillow with Poly-fil. Make sure that you pack the corners well and spread the Poly-fil evenly throughout the pillow. The more Poly-fil the firmer the pillow. There you have it! Enjoy! 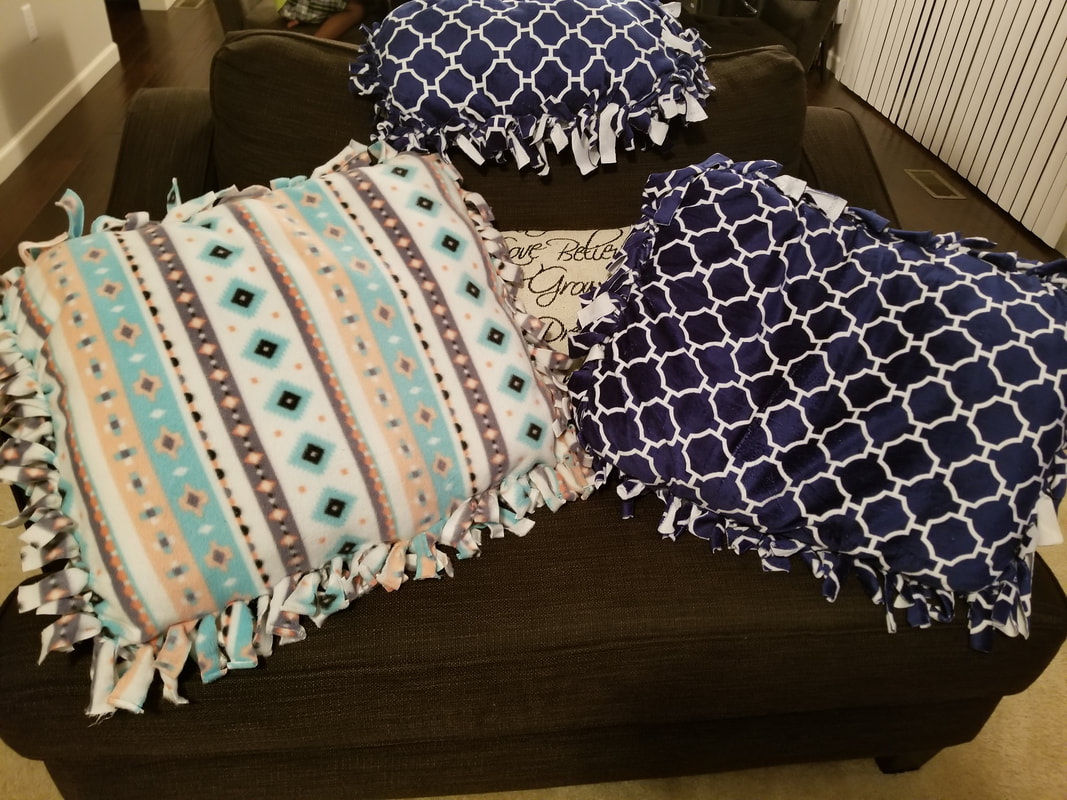 Here is a quick and simple TeePee idea for a slumber party or cozy reading nook!
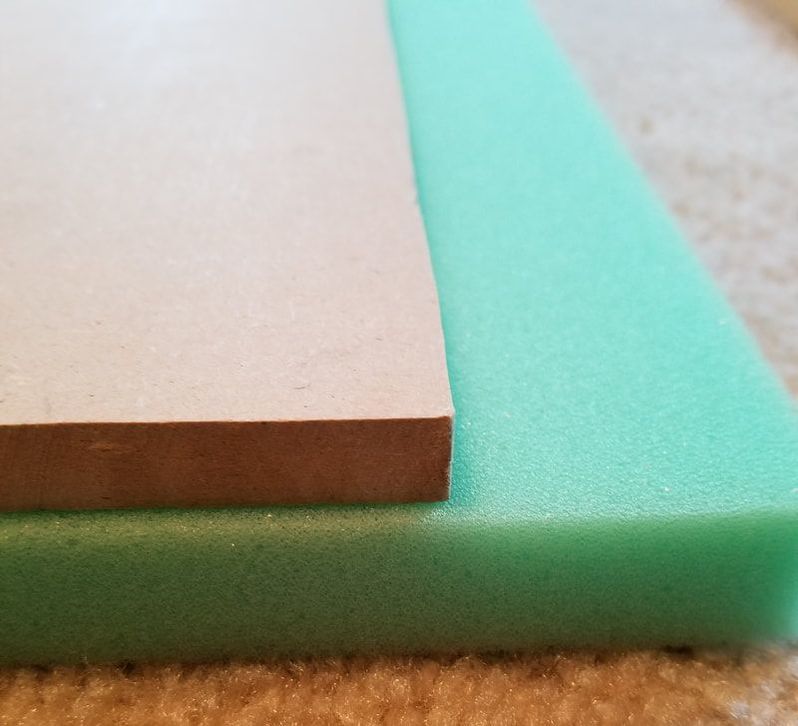
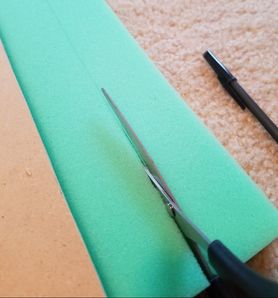
I have a couple of more crafts to work on before school starts in a couple of weeks. Today I am working on crate seats for my classroom. There are a ton of tutorials on how to make the seats. Here is the one I am following: 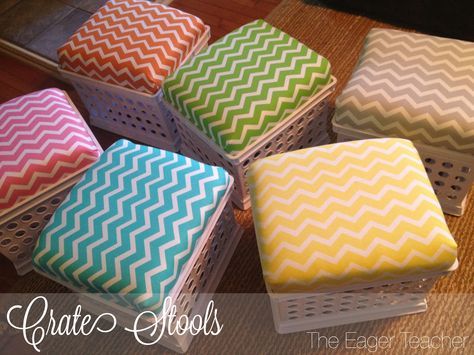 Materials: * Crates- I bought my crates from Target in the school/dorm section. *Foam- I bought 1 inch thick foam from Joann's. * Plywood- My husband cut mine to size but I am told that Home Depot will cut the wood for you if you give them measurements or even bring the crates with you. *Staple Gun 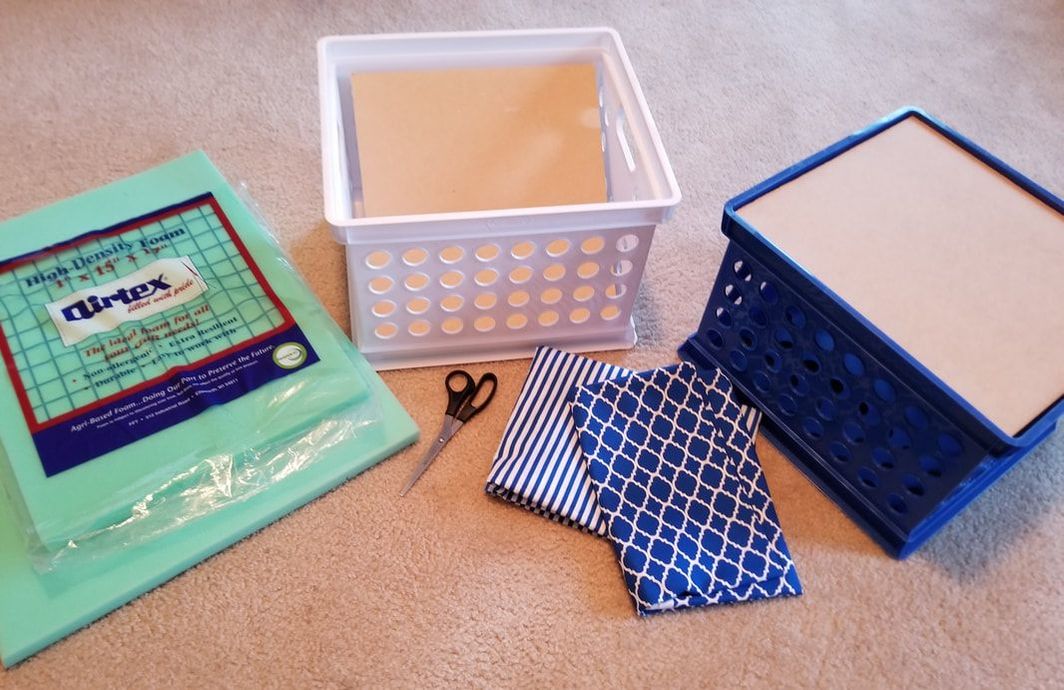 After the wood was cut it was time to cut out the foam. I used craft scissors but a serrated butter knife will work well too.
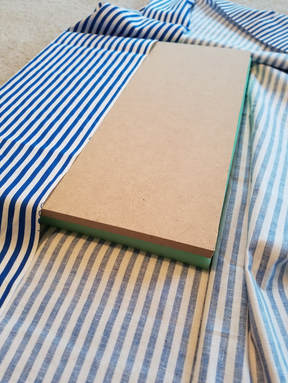
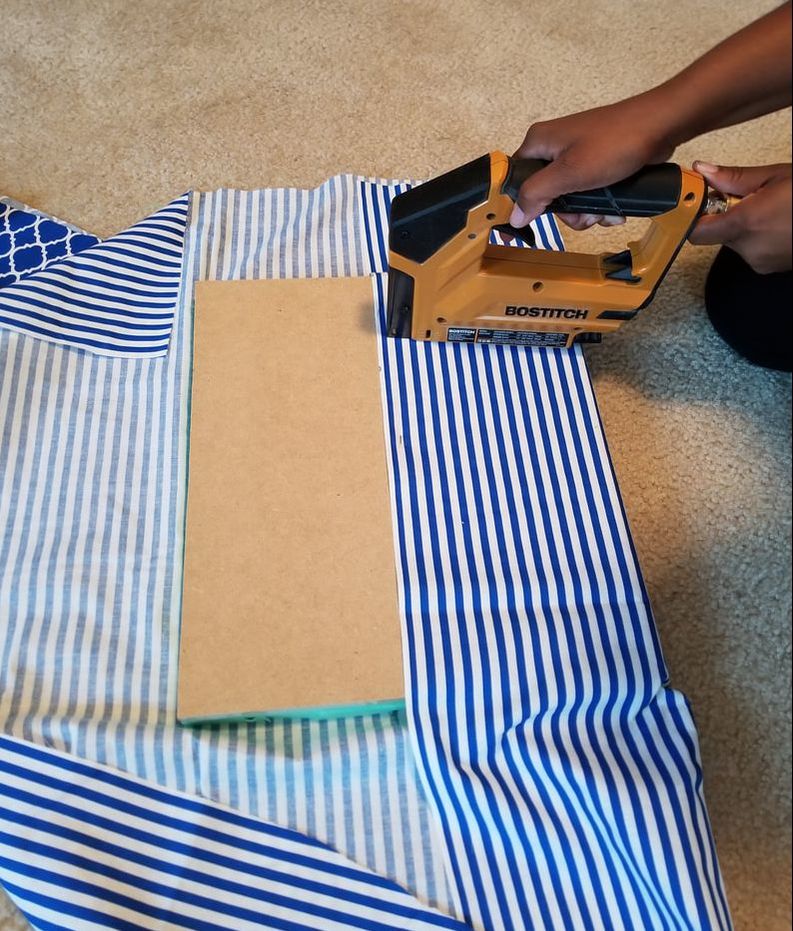
Lay out your fabric and stack the foam and the plywood on top. Wrap fabric around the stack and staple to the plywood.
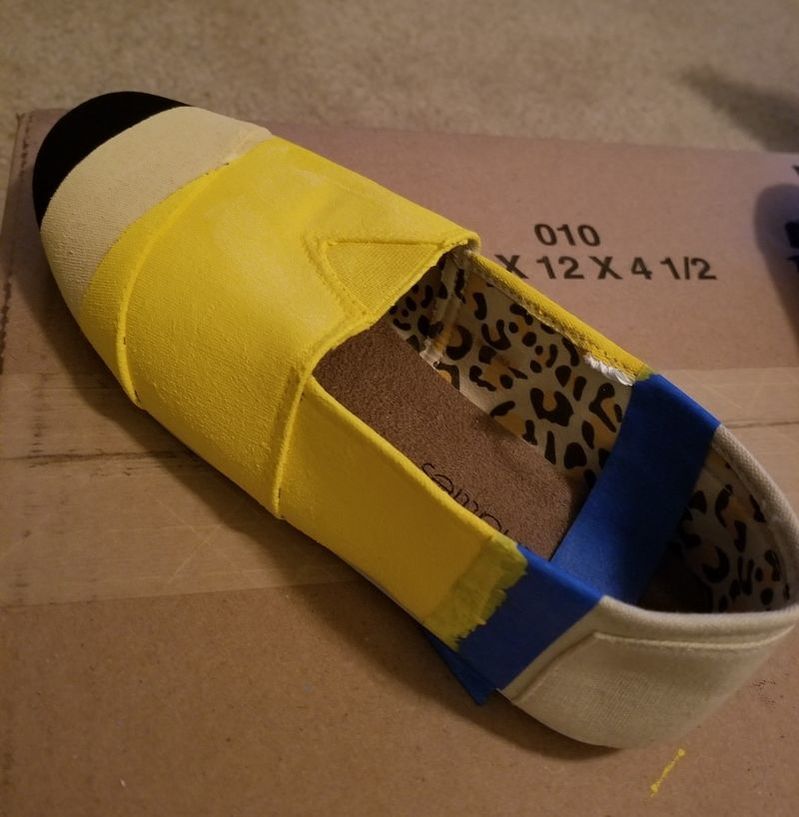
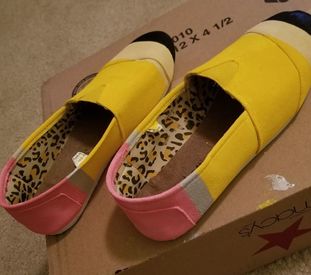
Turn the cushion over and place in the crate. BAM!!! There you have it!!! **Some people attach ribbon to the sides of the cushion so they can easily pull the seat up. 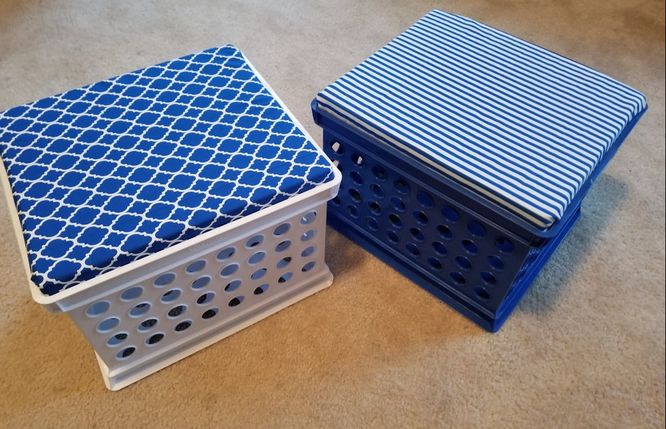 Happy day after the 4th of July! Hopefully, you celebrated with family and friends and everyone had a safe great time. We had a great time. Now that the 4th is over it's time for a little work. Once July hits I start taking time to think about the upcoming school year. I do a little paperwork here and there but this week I wanted to do something fun for the upcoming school year. I found these great pencil shoes that are sure to have my 5th graders talking! 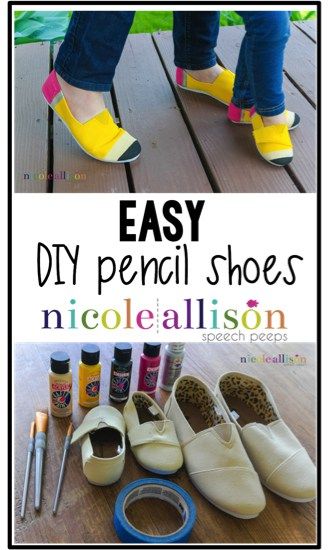 Here is the post that I got the idea from. I loved the look and after reading the instructions it seemed super simple. Here's what you'll need: * Light colored canvas shoes- I bought mine for $9.99 from Hobby Lobby * Painters Tape * Paint brushes * Paint- Off White, Yellow, Black, Pink and Silver 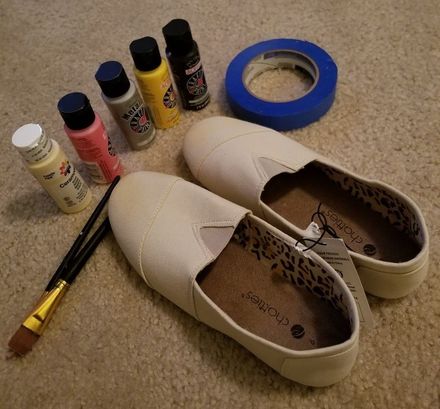 Instructions: 1. Starting at the top of the shoe use the tape to draw out your lines. Press the tape all the way down so that the paint doesn't bleed through. 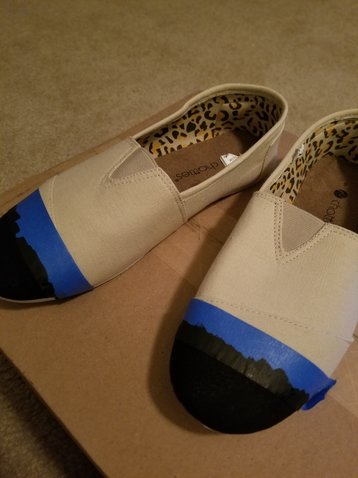 2. Continue your way down the shoe taping and painting.
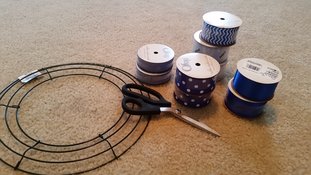
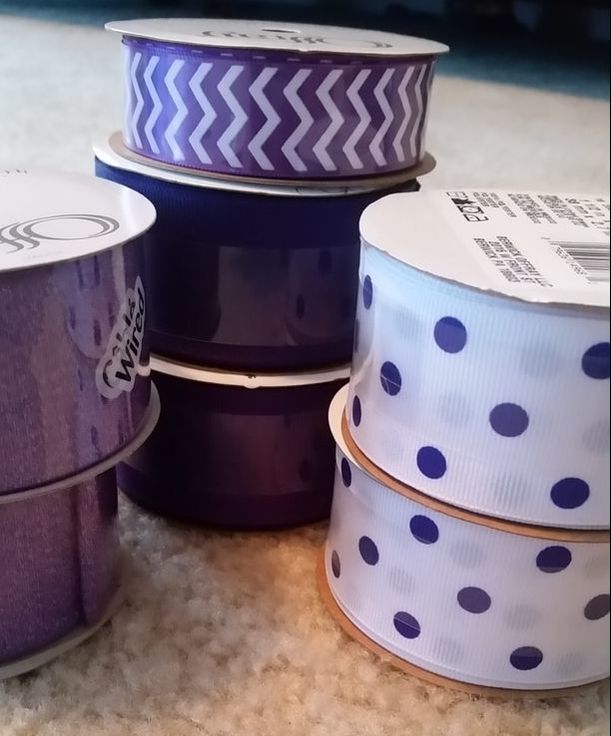
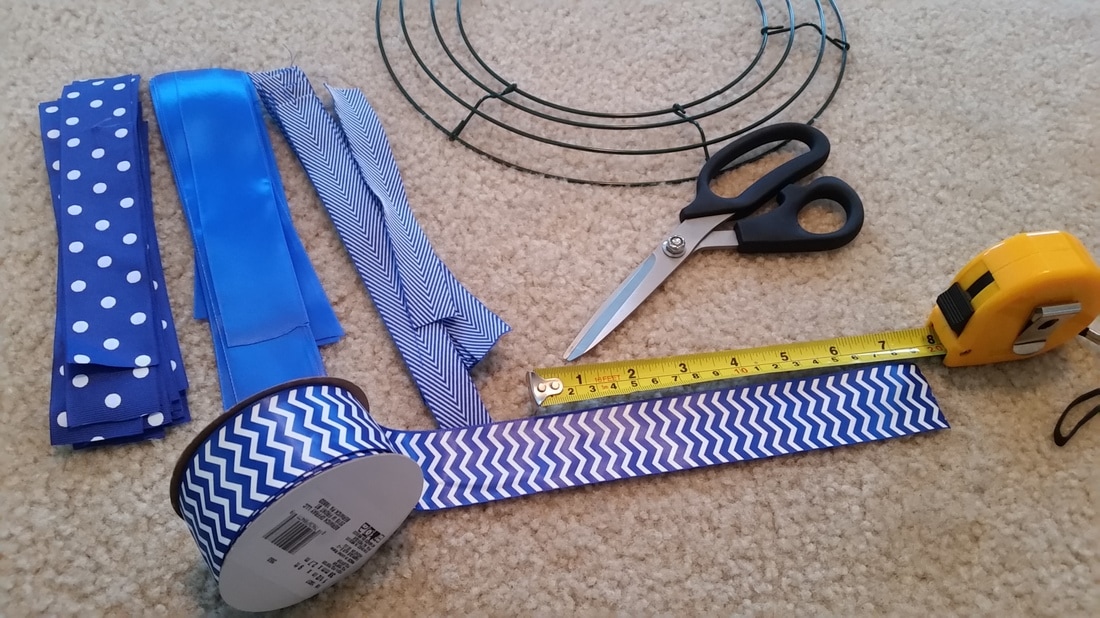
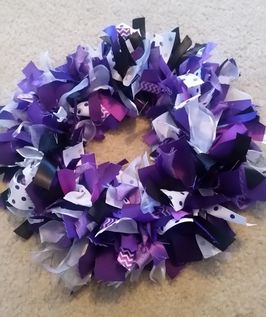
3. Now show them off! I can't wait for school to start so I can show off my new foot wear!!!! 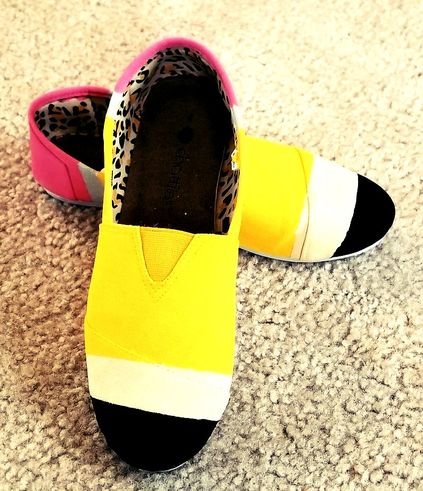 My mom asked me to find some kind of gift that I could make for a couple of principal friends of hers. After many days of searching and lots of screenshots sent to her we found a ribbon wreath that she liked. The ribbon wreaths we saw were school colors so that is where we began. How To Make Ribbon WreathsMaterials: Fabric Scissors 12 inch box wreath frame 8-9 rolls of ribbon
I wasn't sure how to start tying the ribbon but found a great diagram at bfranklincrafts.blogspot.com that helped a lot. The diagram is used for different fabrics and ribbons but I used the placing per the color of ribbon I was using. 
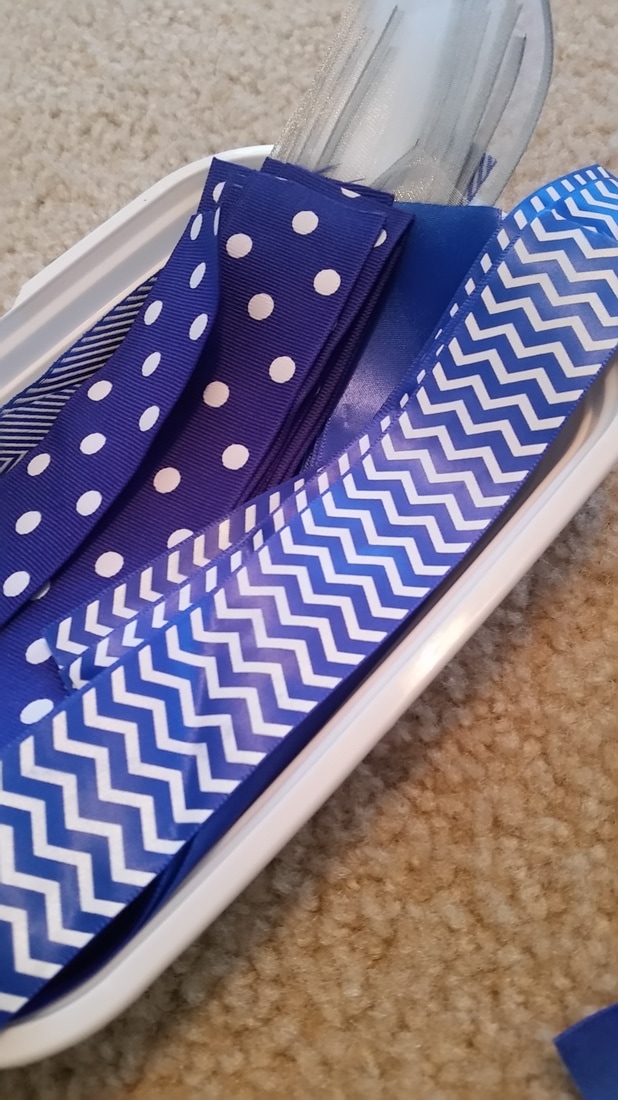
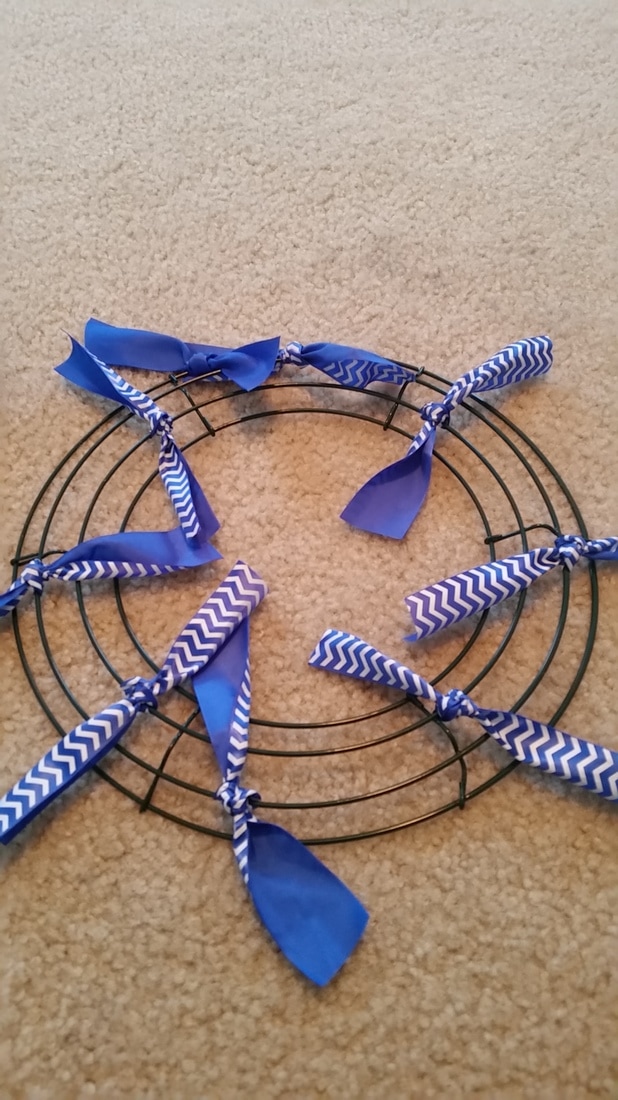
Step 1: Cut ribbon into 5-7 inch pieces. I suggest you get comfy in front of a good movie and cut until you are all out of ribbon to cut. I used a plastic container to place my ribbon in case I had to stop I could just close of the ribbon without it being all over the floor. Step 2: I used the diagram from the above site to start typing the ribbons to the wreath.
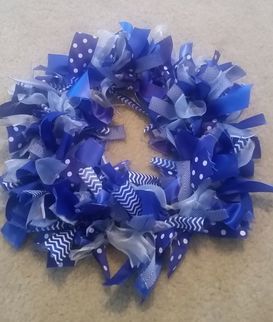
Step 3: Keep tying until you've filled up all empty spots on the wreath placing various ribbons in different places. 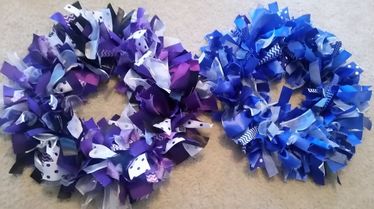 For more wreath ideas and more tutorials on how to make a ribbon wreath check out my Crafts board on Pinterest.
This post contains affiliate links meaning I may earn a commission if you use those links.
My daughter can't get enough of making slime. It's everywhere. Her friends are making slime, there are slime kits everywhere and I even had my class make slime on the last day of school and it was a hit!!!
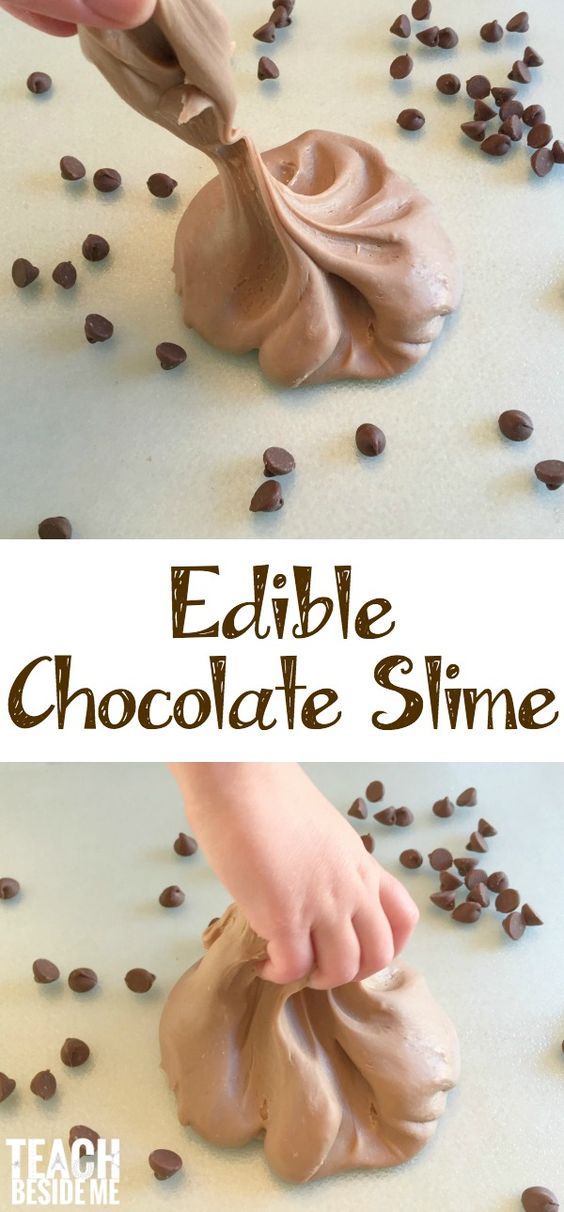
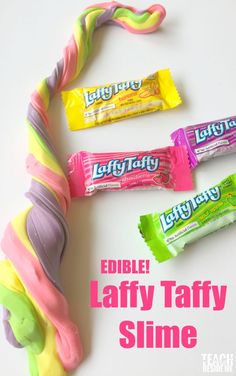
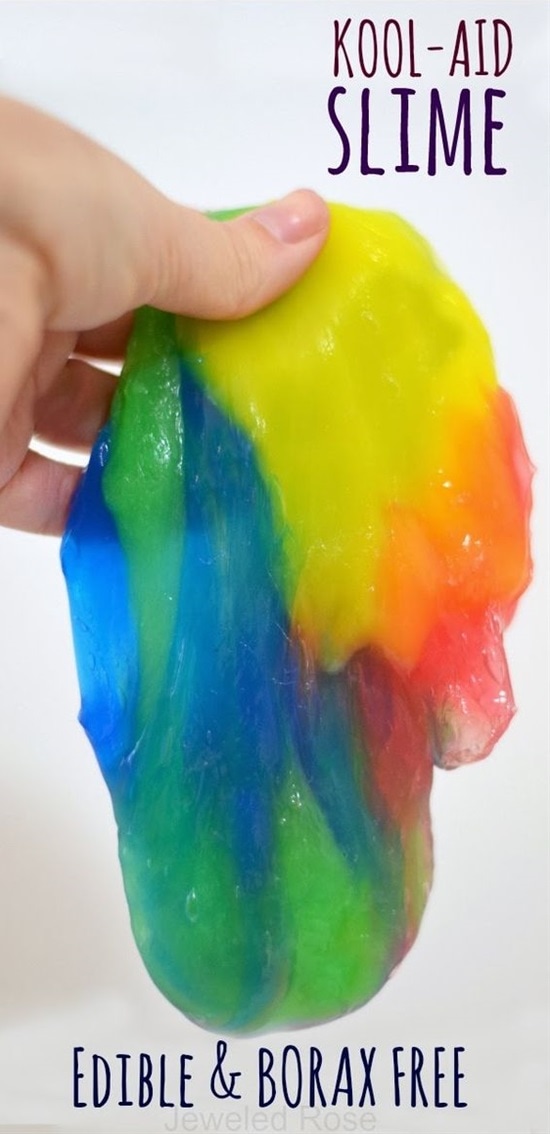
So I thought it was only right to do a post dedicated to slime!!! I'll keep it simple to a few of my daughter's favorite slimes to make. 1. Edible Slime
It can be a little unsettling to watch your kiddo bite into slime, but let me assure you it's safe!The 3 types of edible slime below are Chocolate Slime, Kool-Aide Slime and Laffy Taffy Slime.
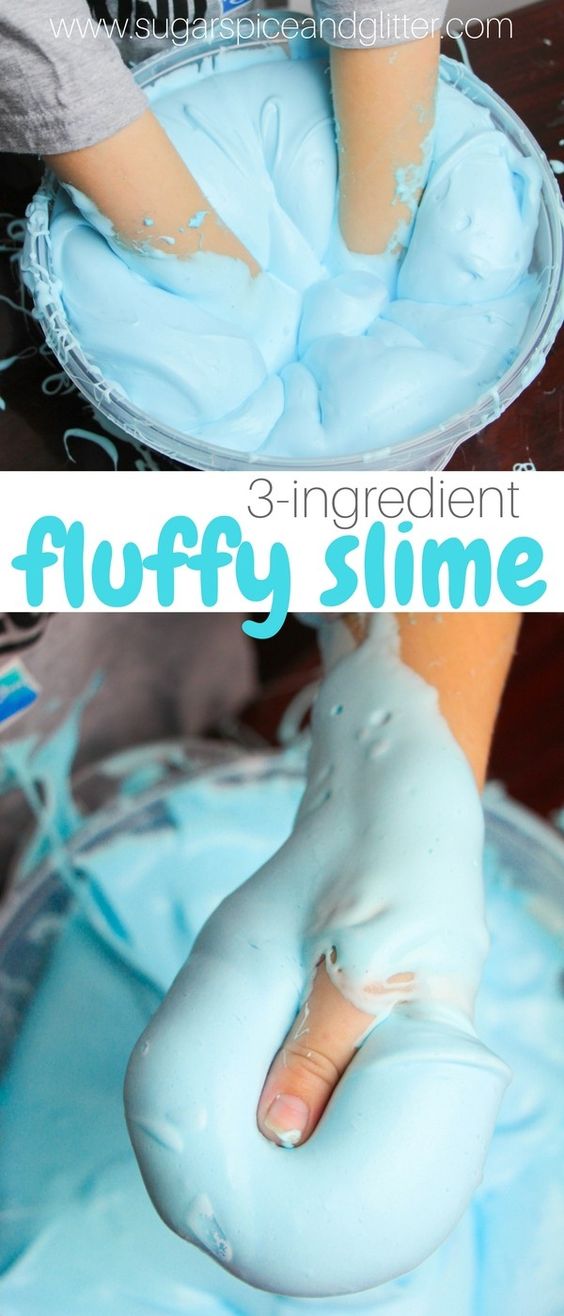
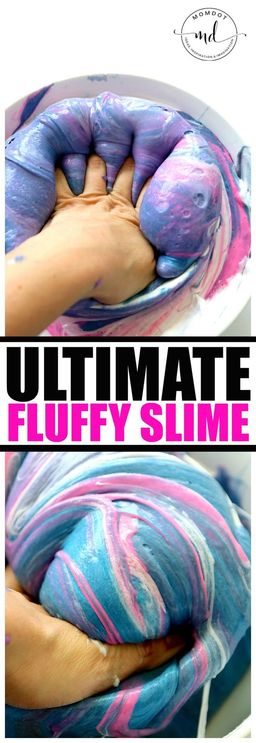
2. Fluffy Slime
One of the things we tend to argue about in our house about slime is where to store it. We get these great cases from Hobby Lobby that have little containers in it but the fluffy slime just won't fit. Fluffy slime is just that folks-FLUFFY!
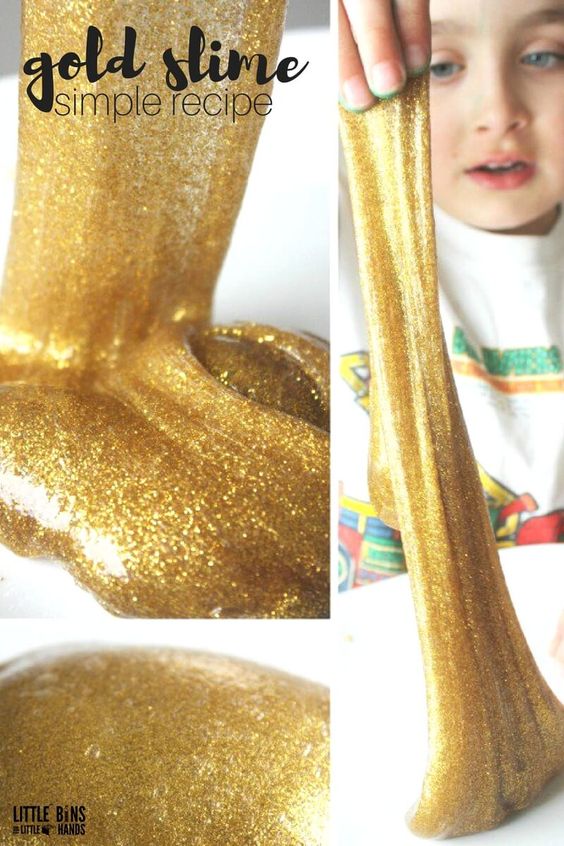
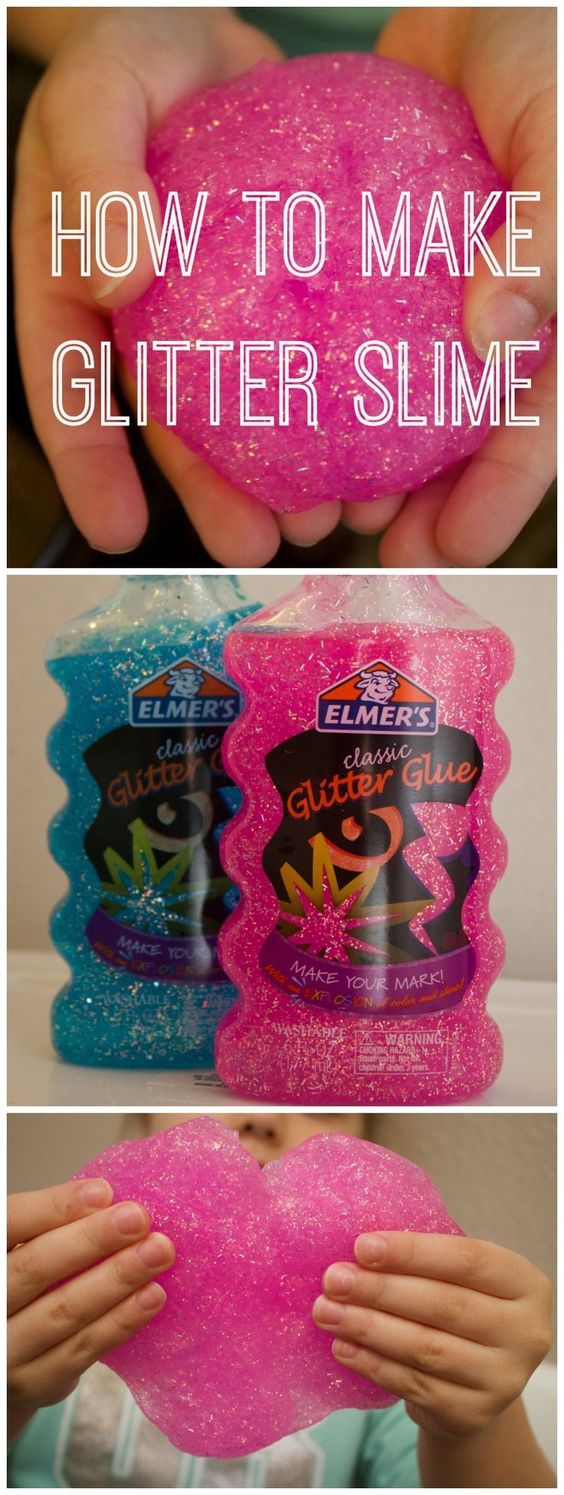
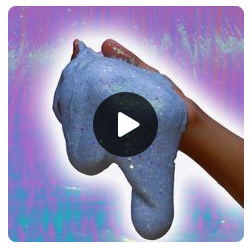
3. Glitter Slime
As a mama the thought of glitter in any project is terrifying. Here are some slime recipes that make it easy to incorporate glitter without the scary mess.
|
Archives
December 2019
|


 RSS Feed
